Welcome to the payment management guide. Follow these steps to add payment methods and manage your billing in GNet Connect.
Step 1: Access Billing Section
Navigate to your dashboard and click on “Billing” under the Administration tab in the left panel.
Step 2: Add Payment Method
Click on “Add Payment Method” to begin setting up your payment information.
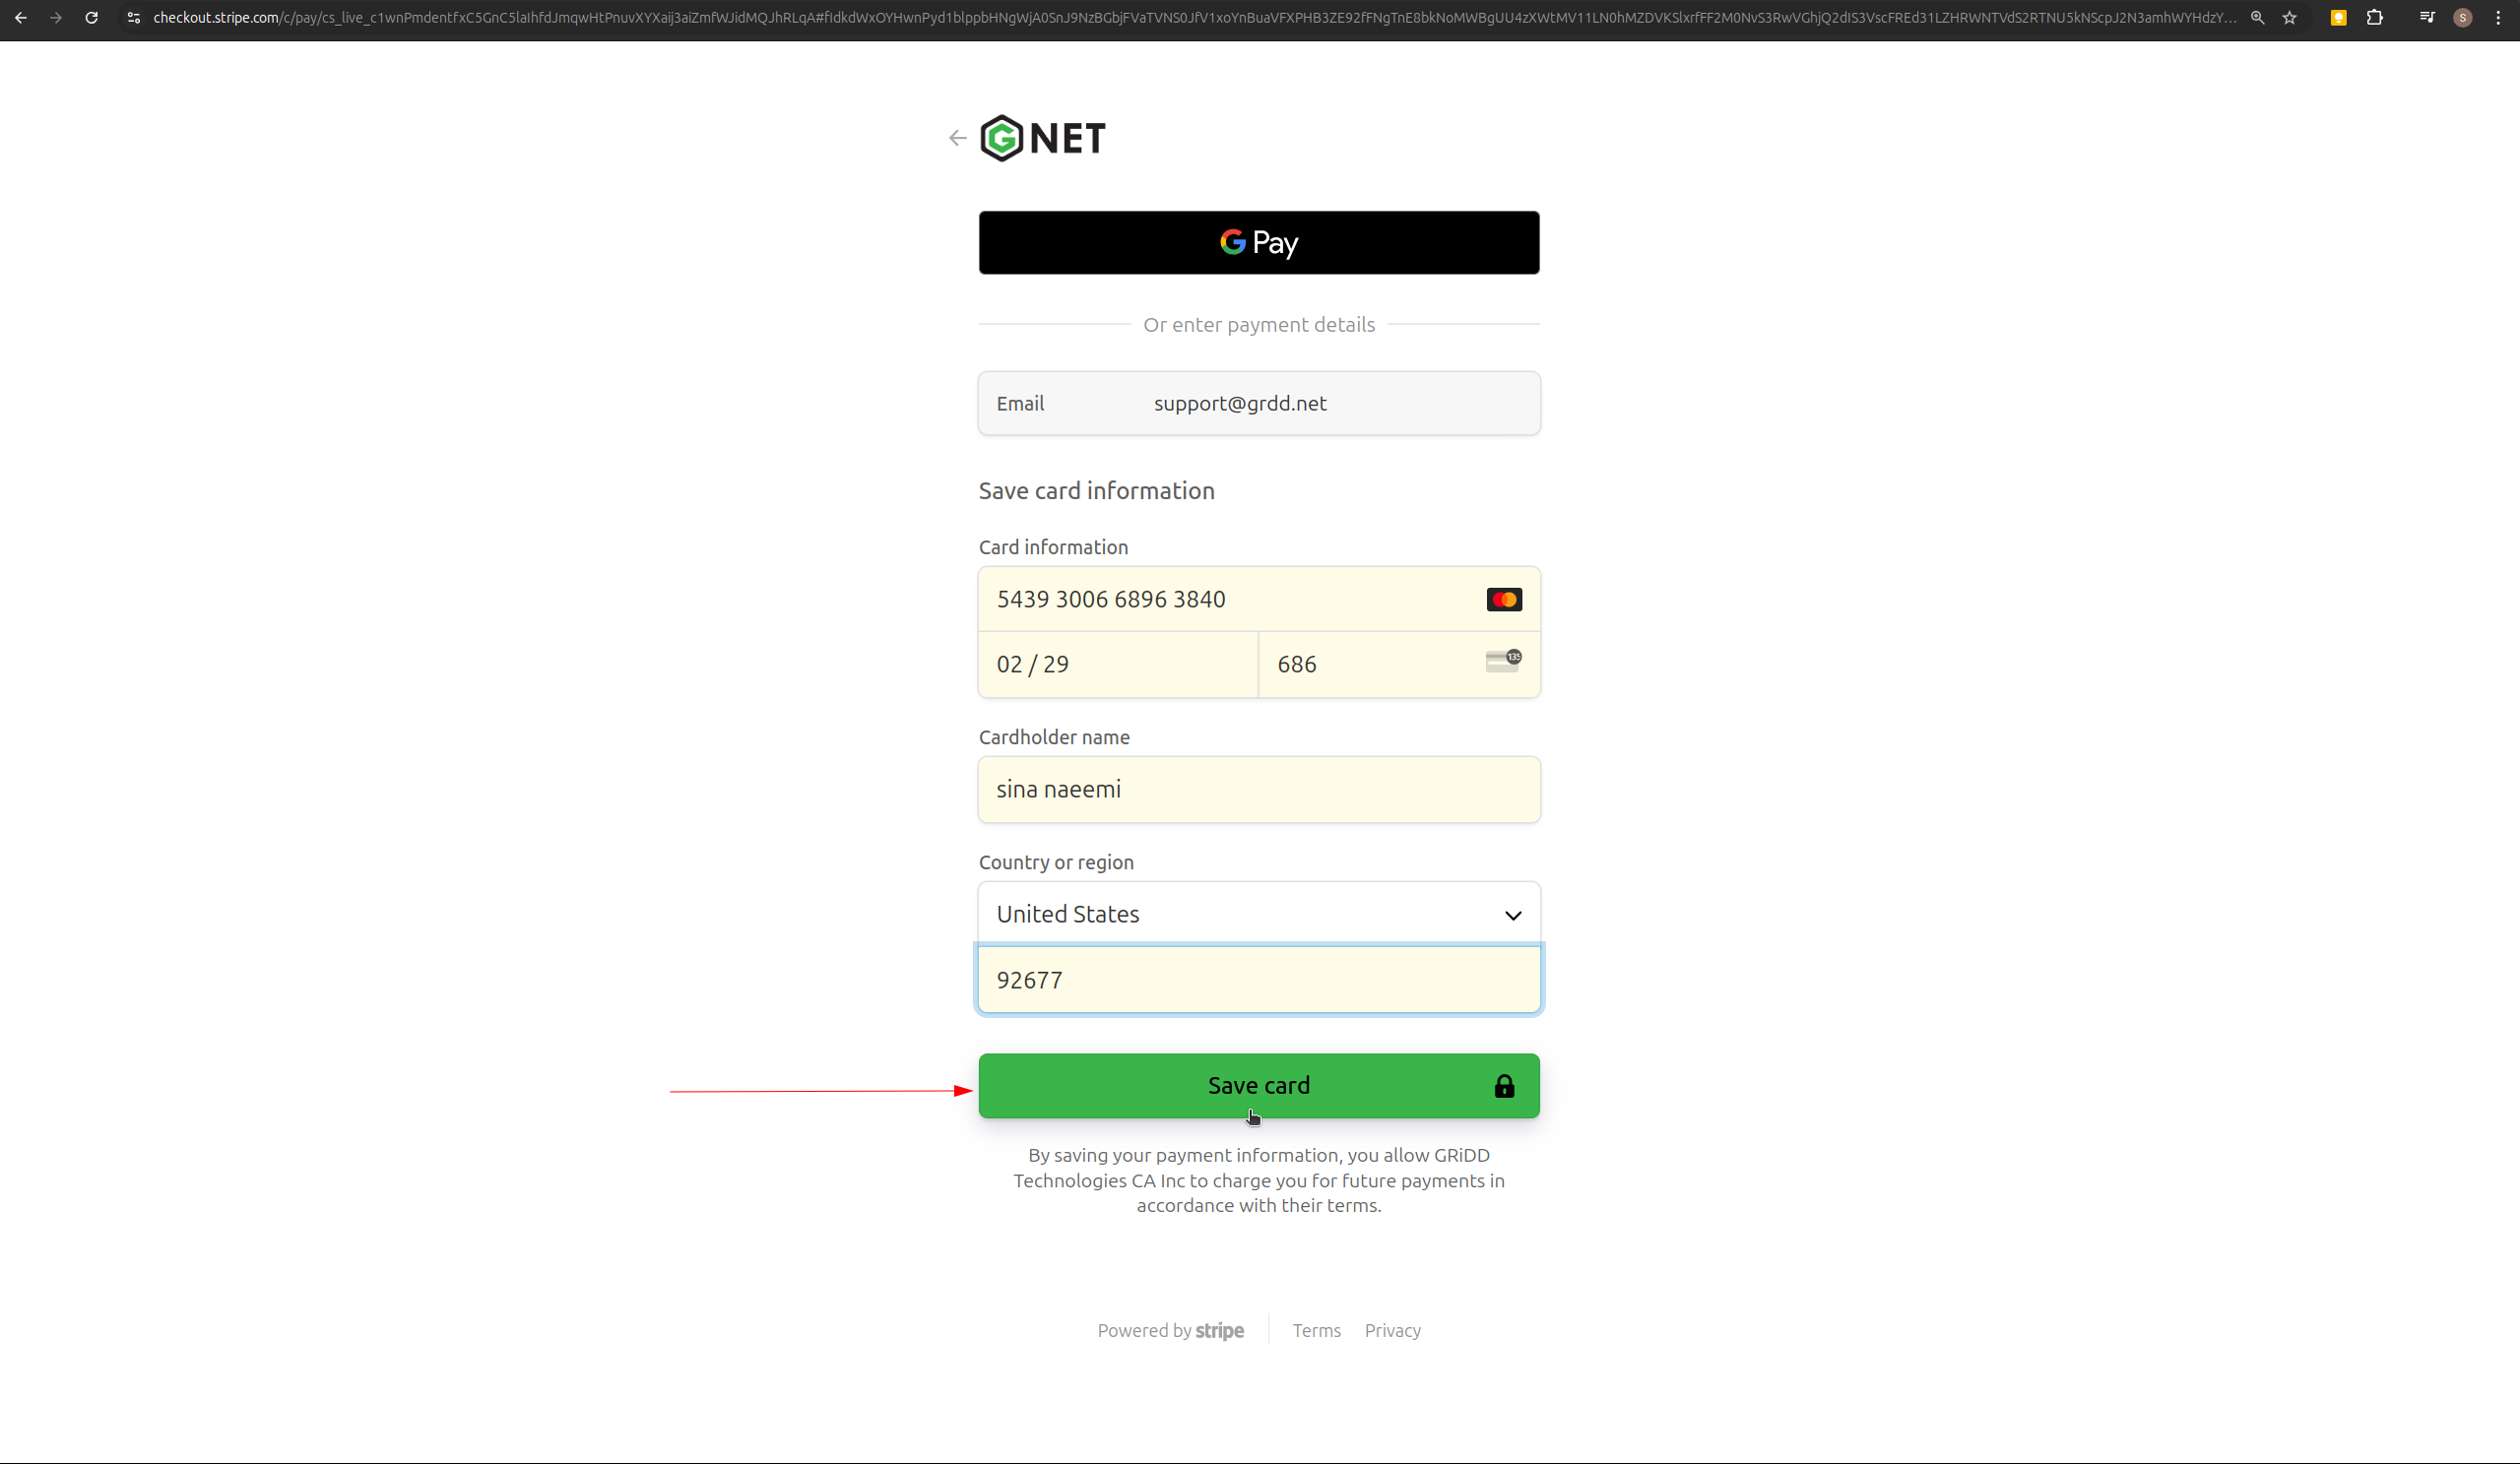
Step 3: Enter Payment Details and Save
Choose your preferred payment method:- Credit/Debit Card
- Bank Account
- Other Payment Forms
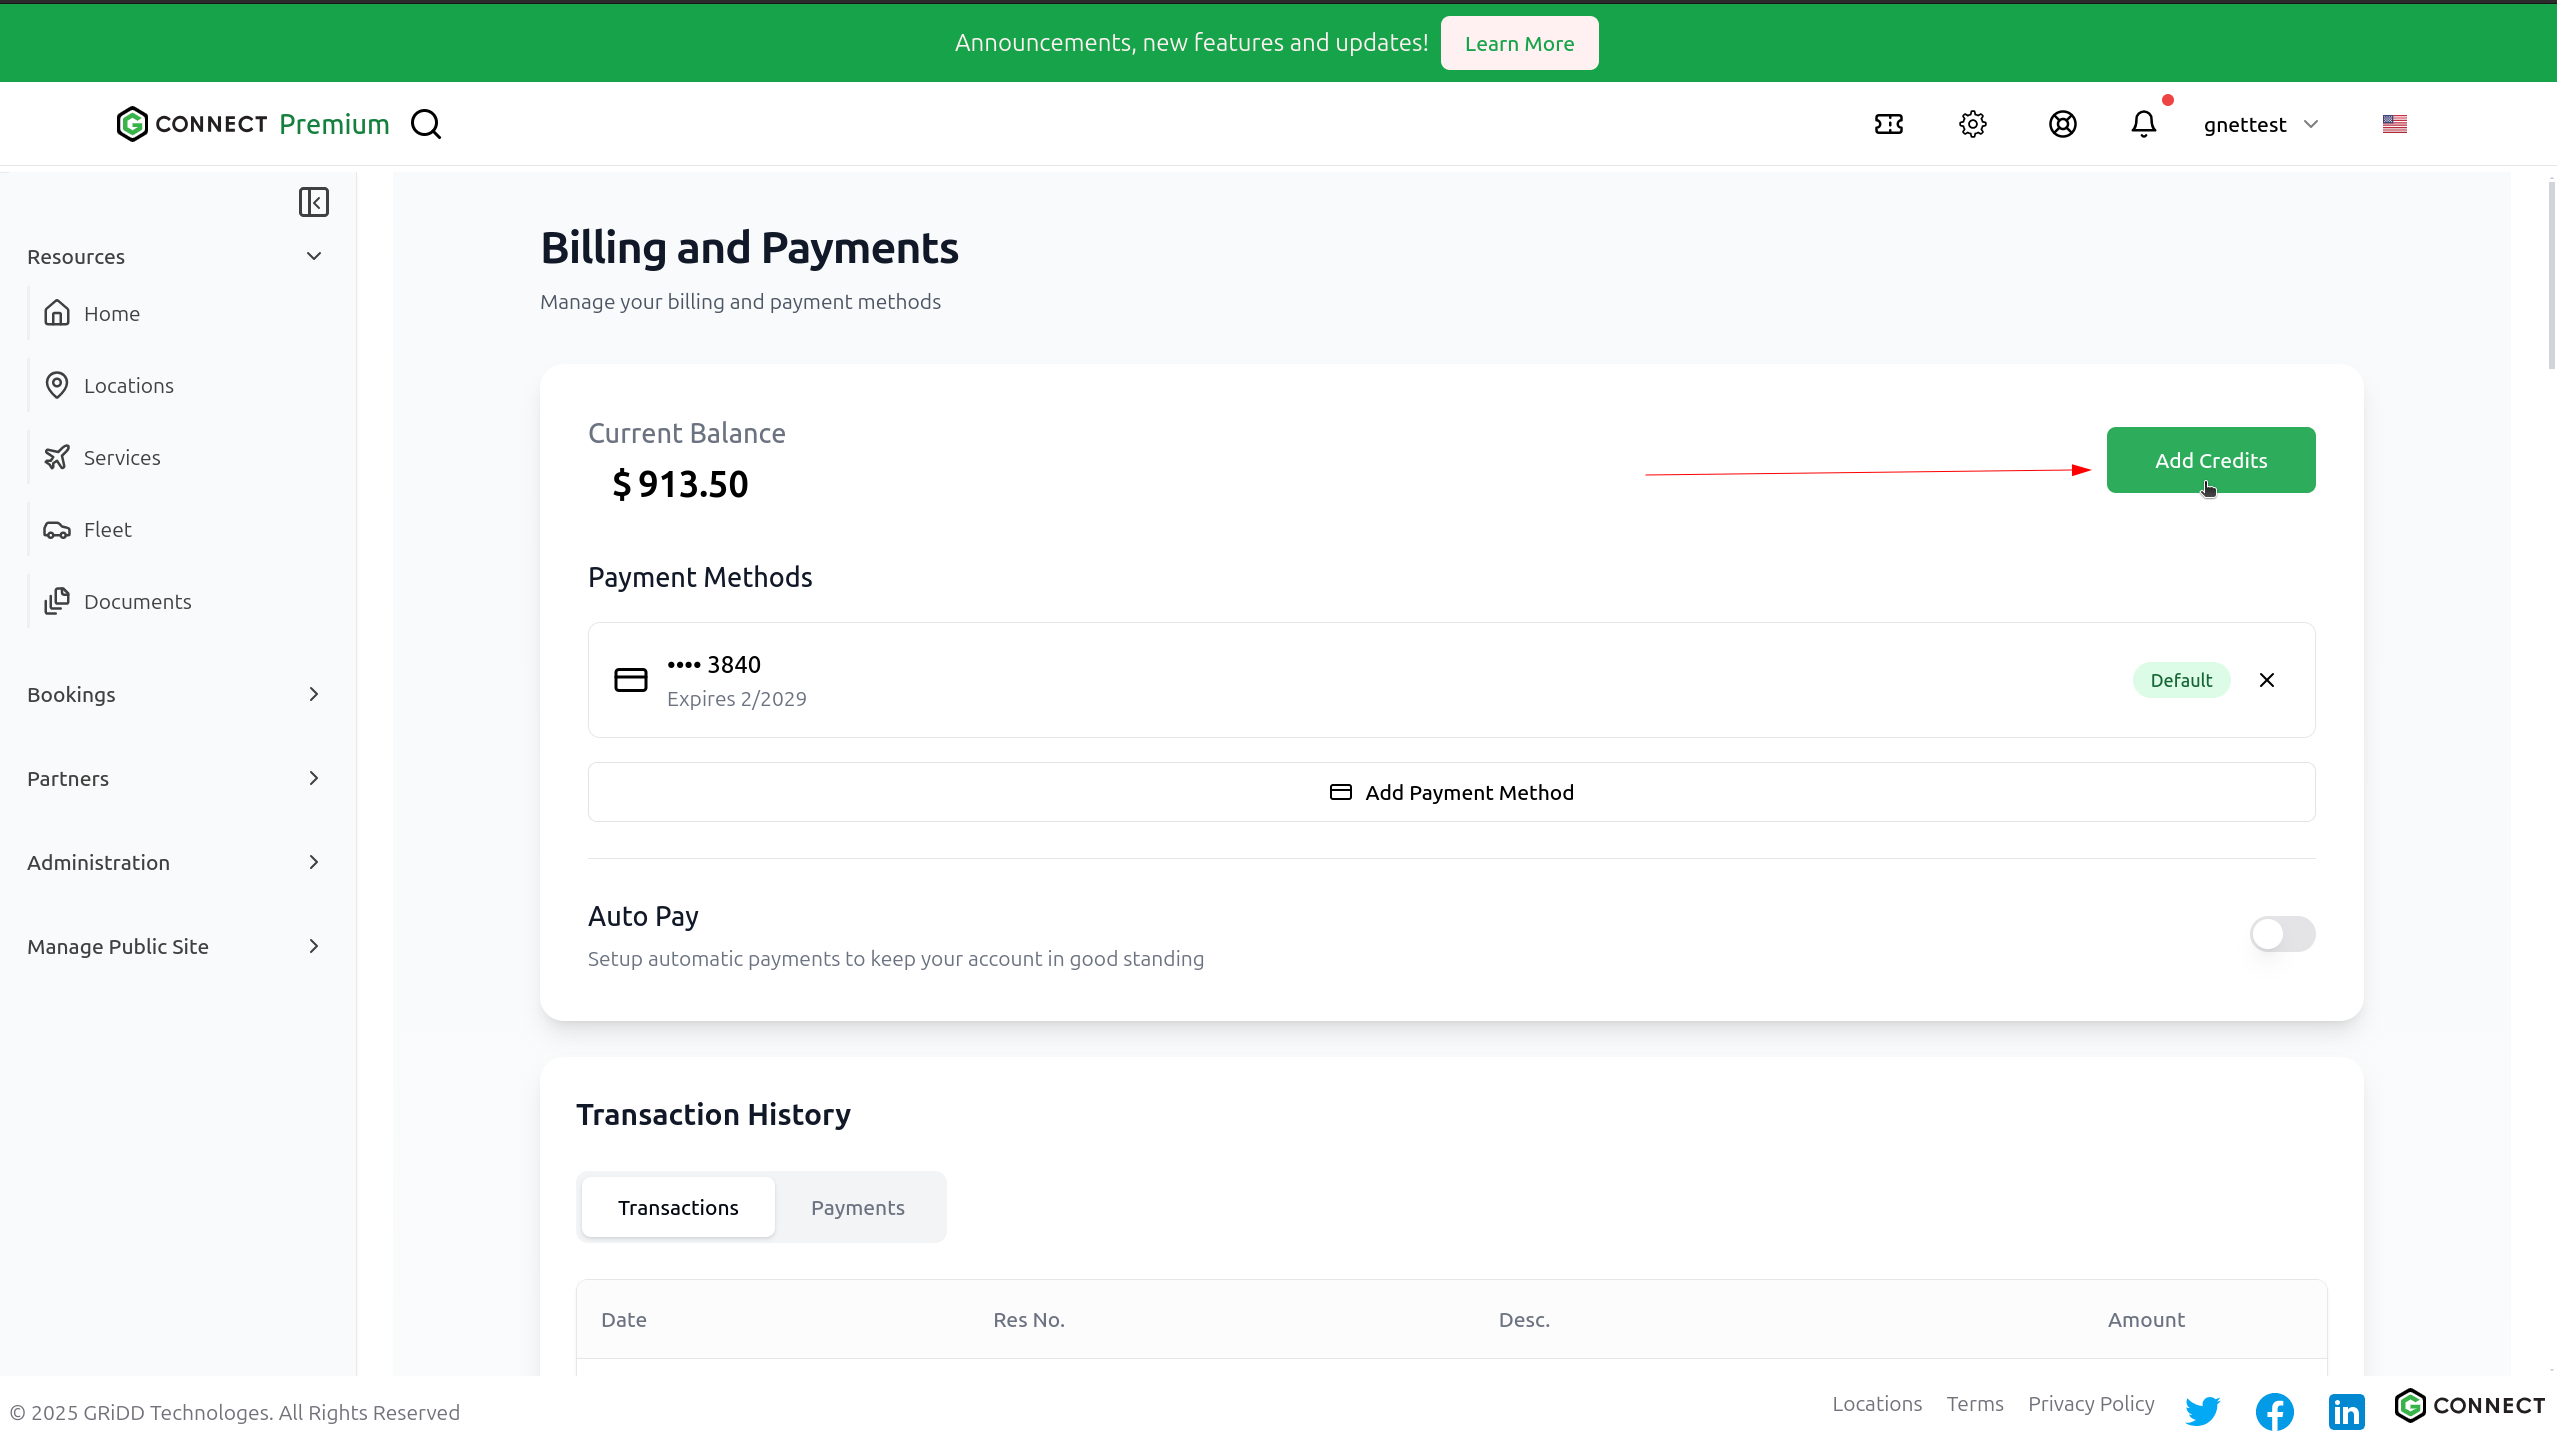
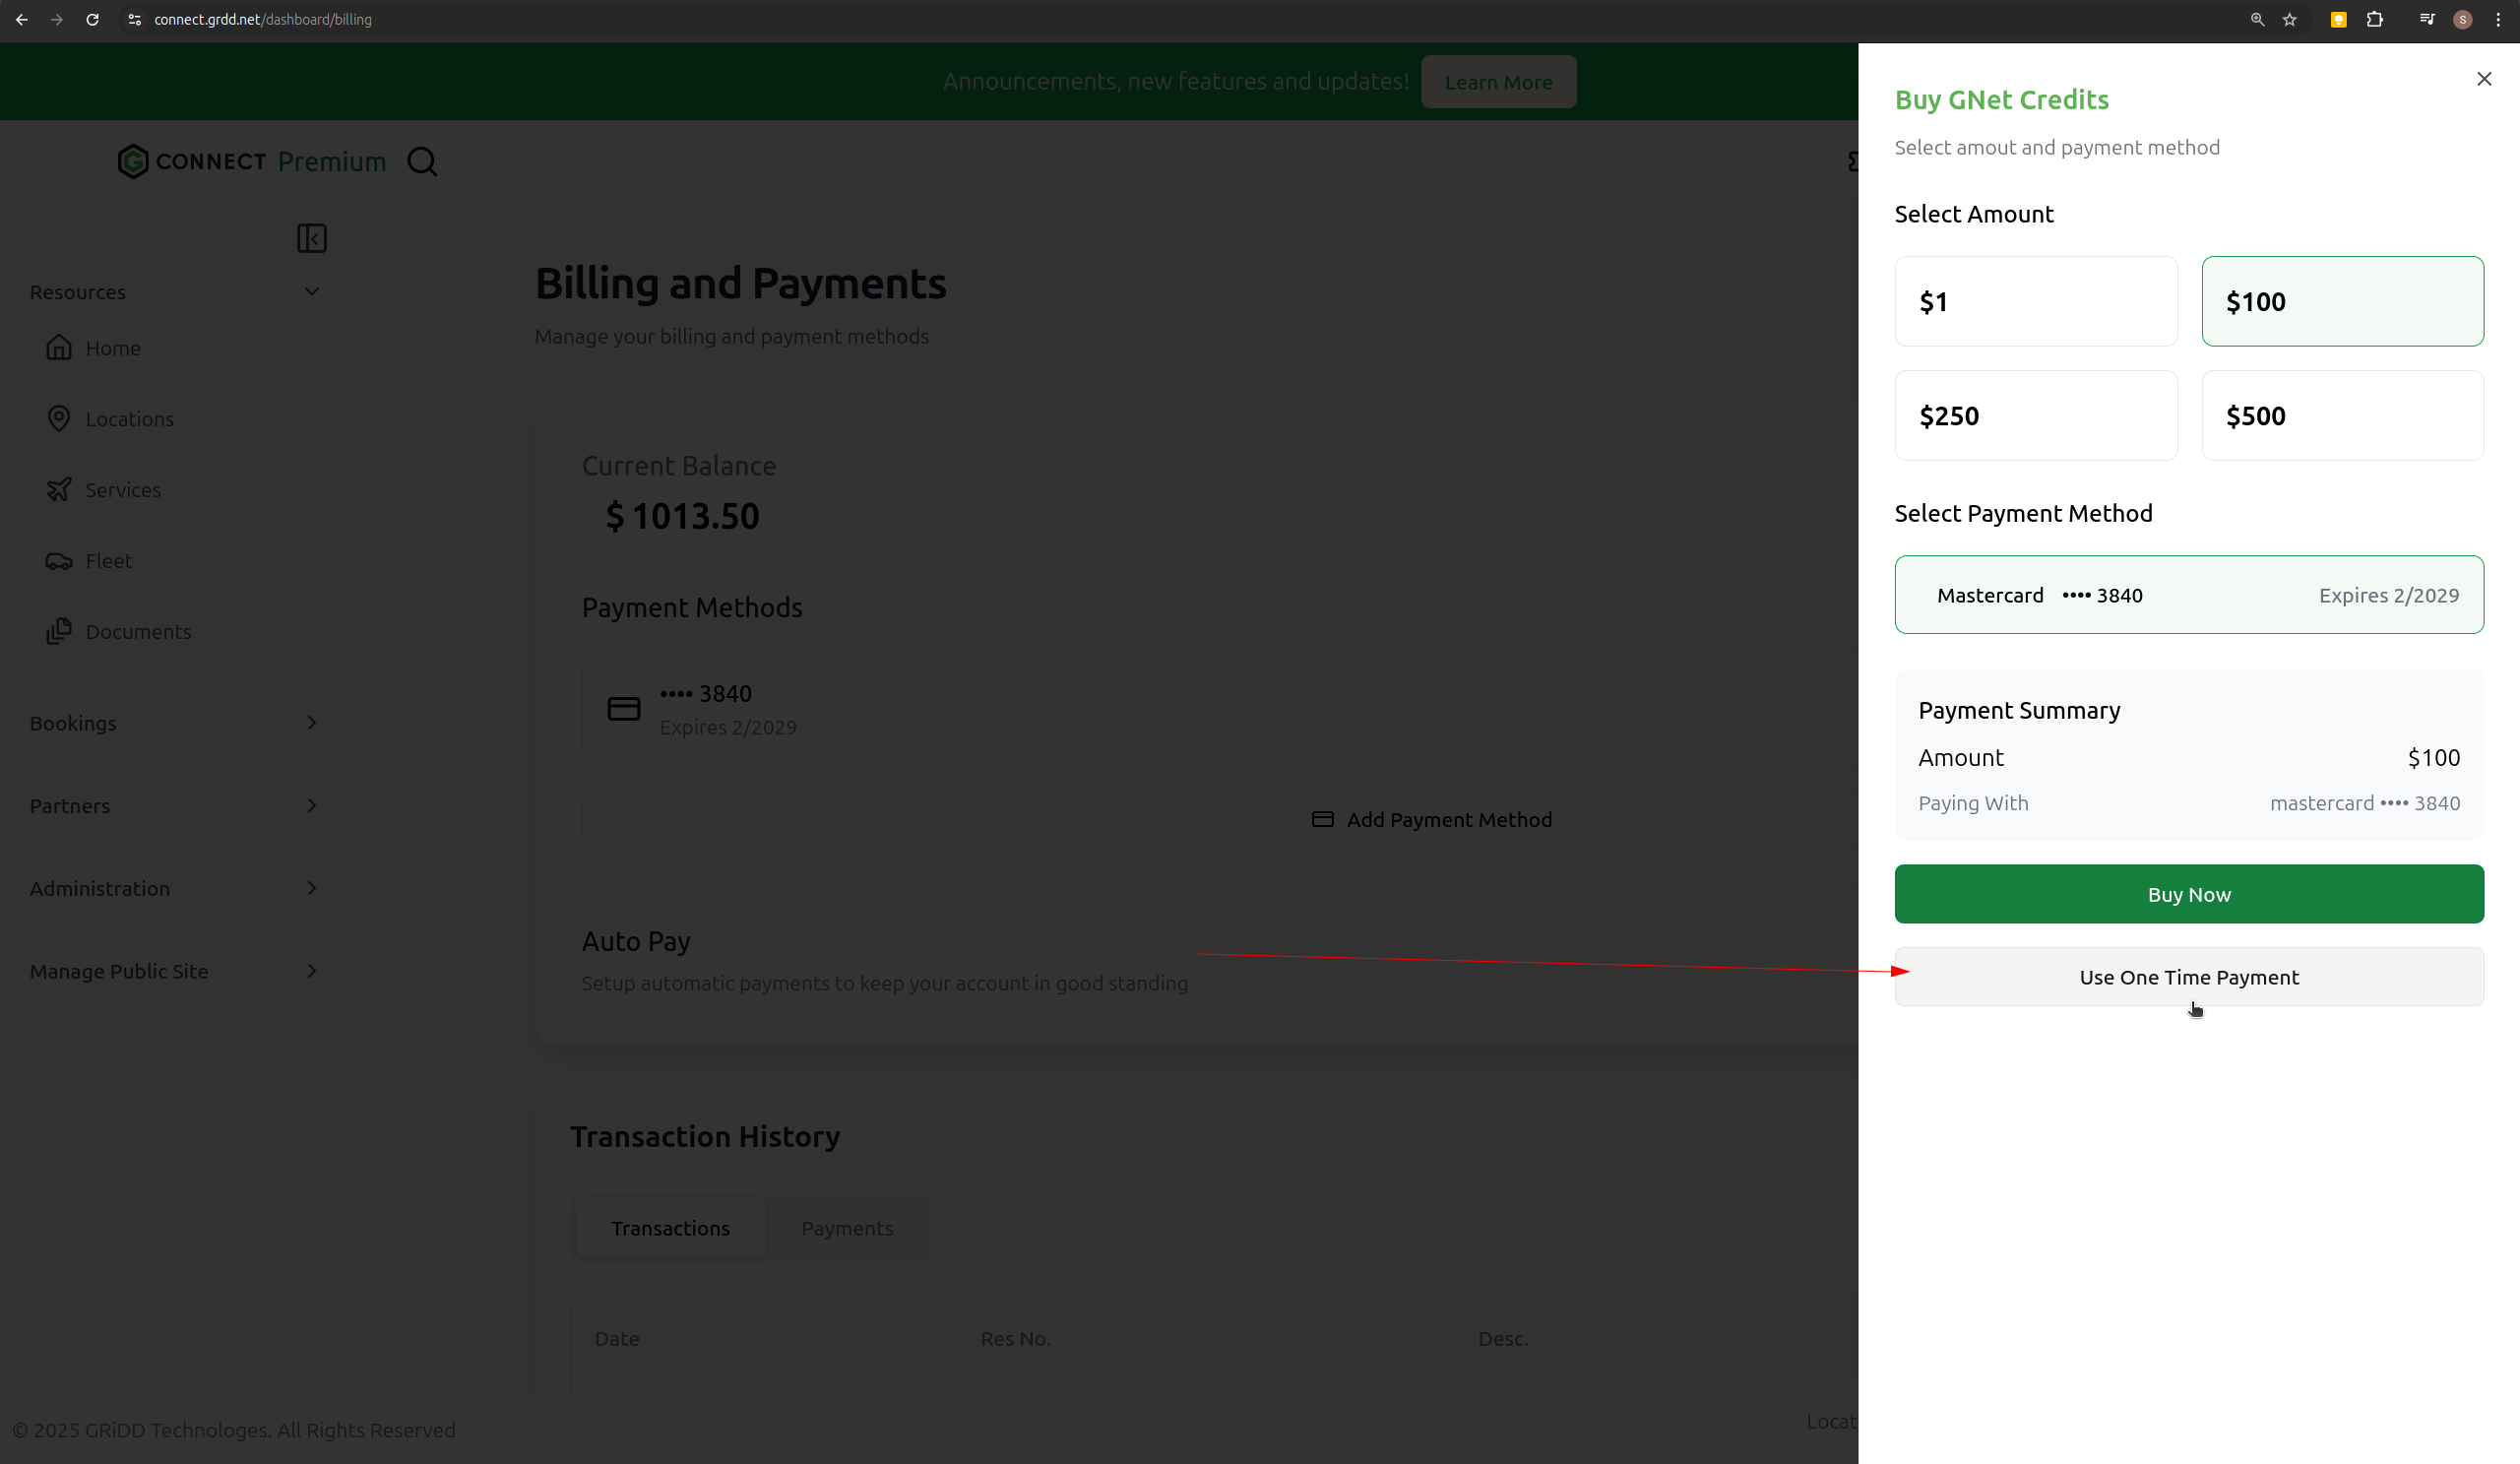
Step 4: Add Credit
To make a payment:- Click “Add Credit”
- Choose the amount
- Select your payment method
- Click “Buy Now”
Step 5: Refresh Balance
Click the “Refresh” button to see your updated balance and transaction history.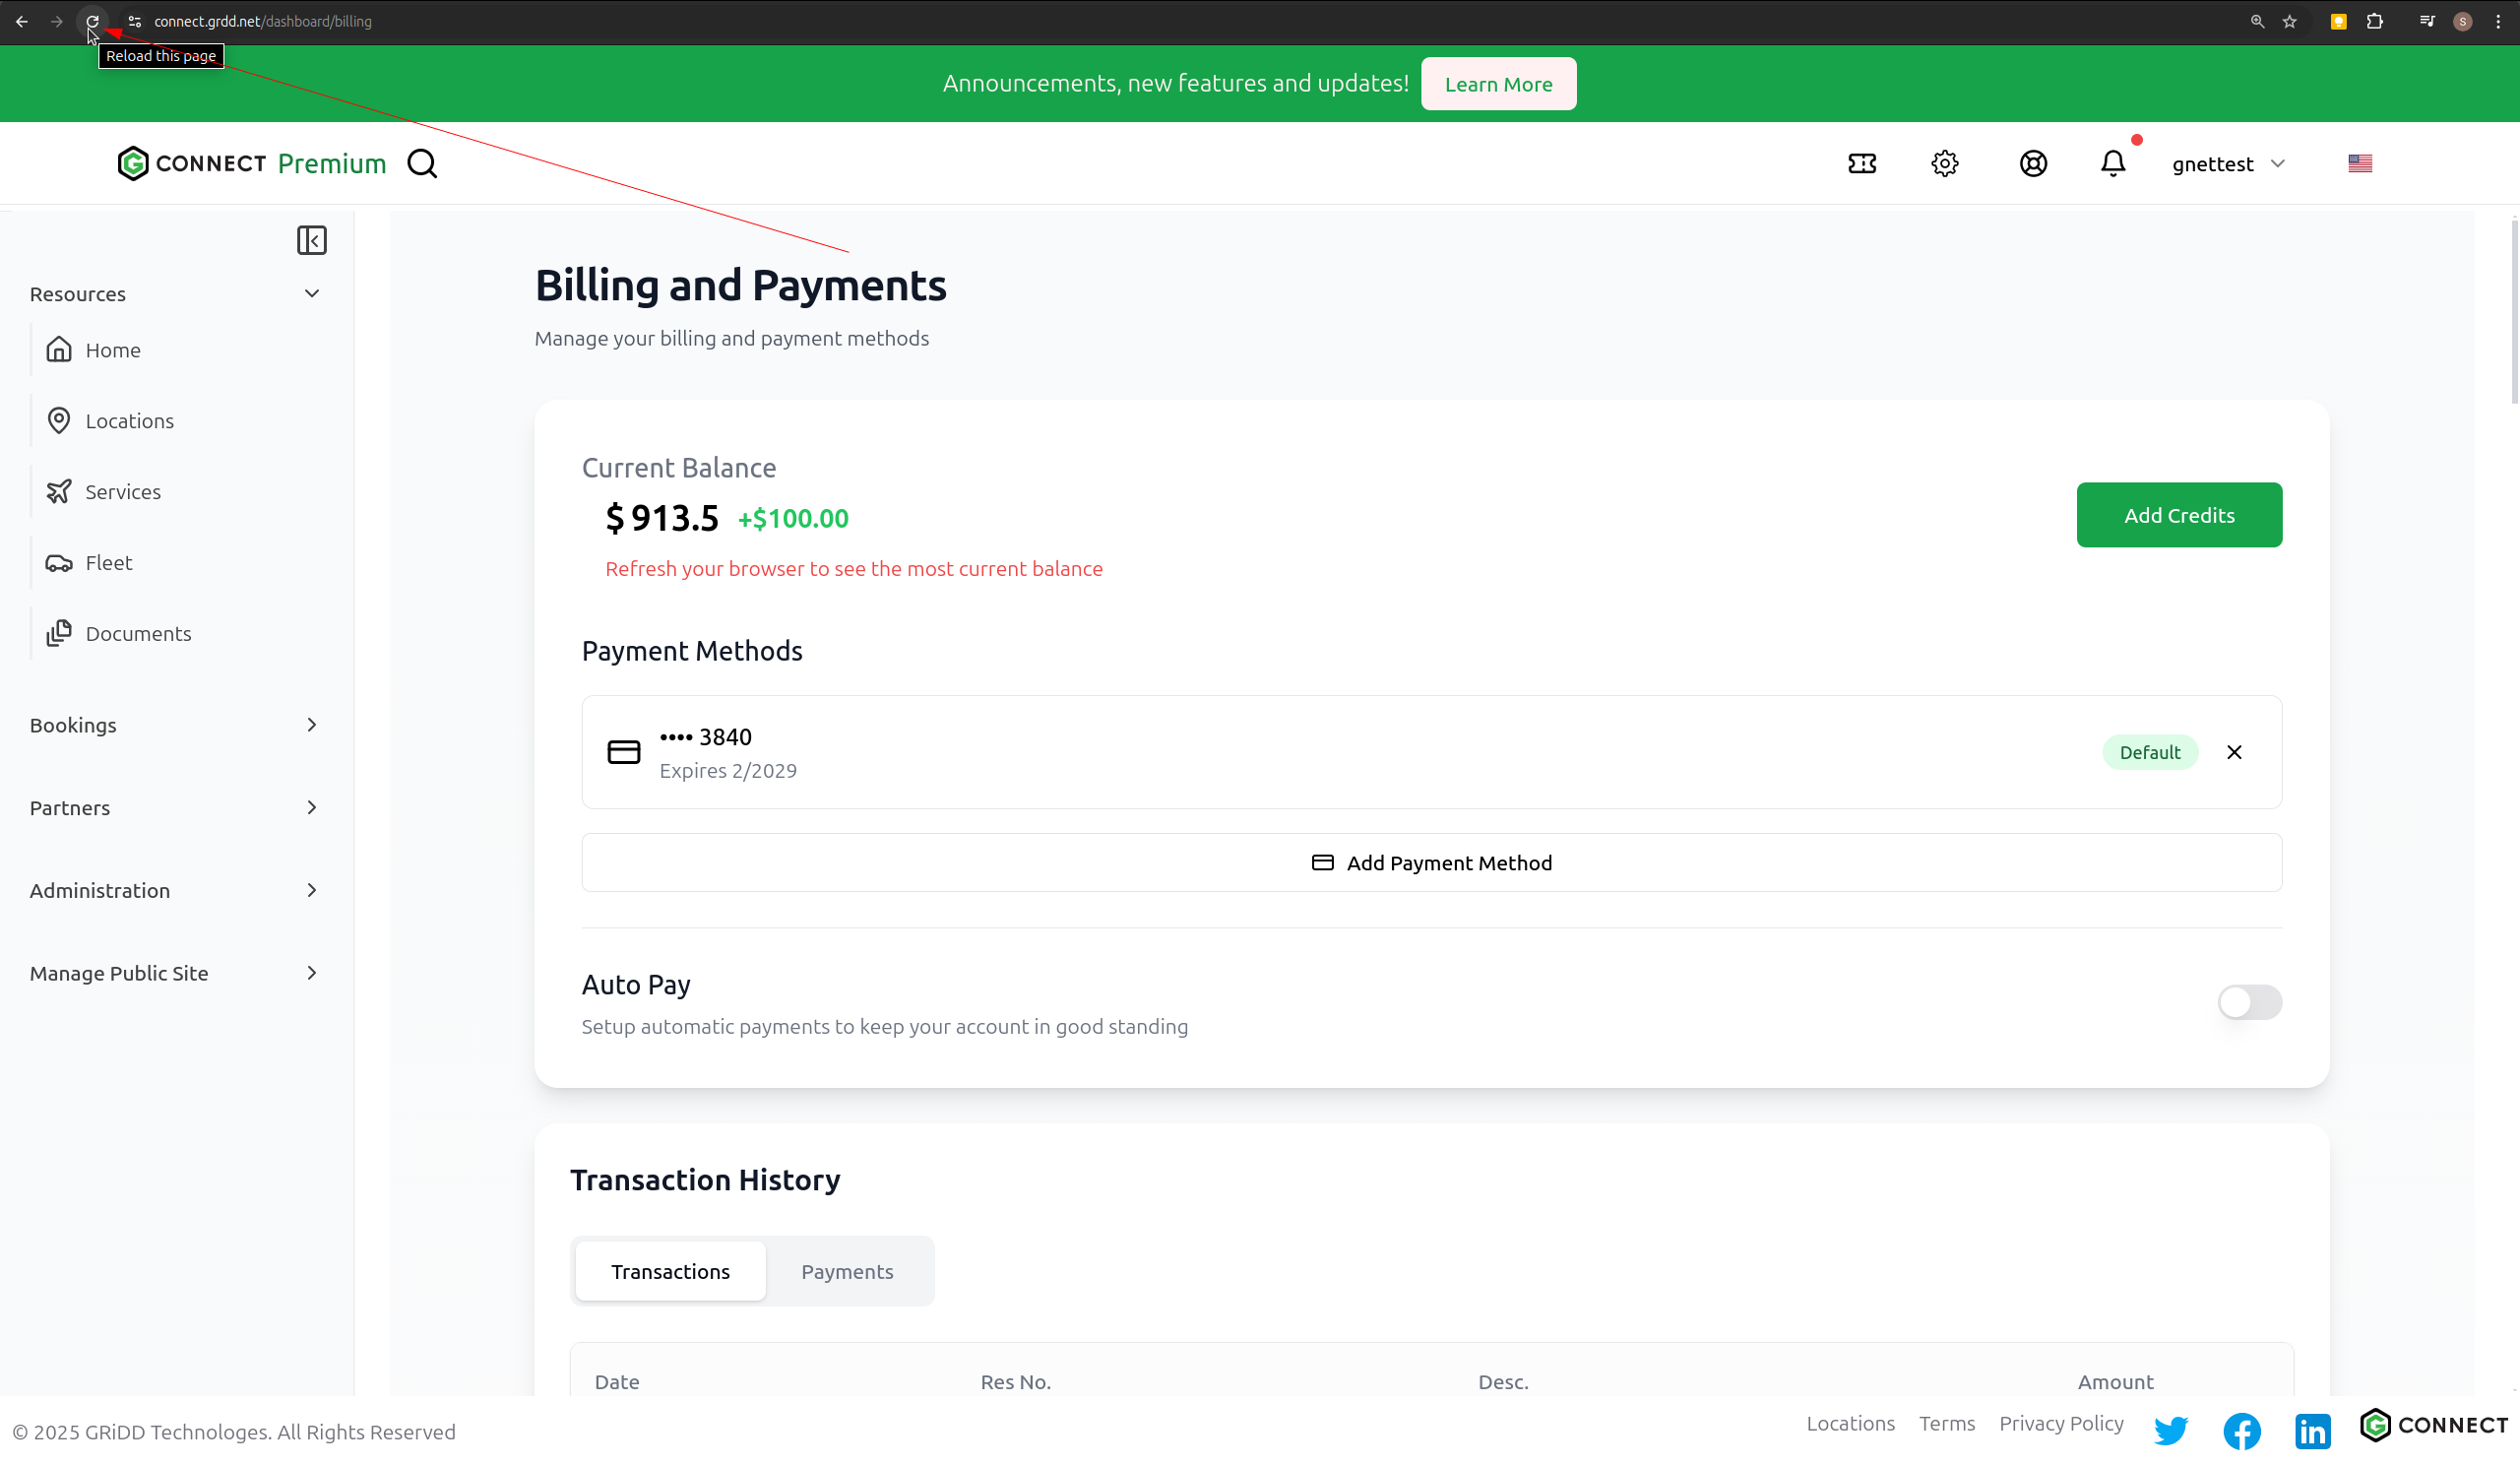
Payment Options
Auto Pay
Enable Auto Pay to automatically charge your saved payment method when your balance goes negative. This ensures uninterrupted service.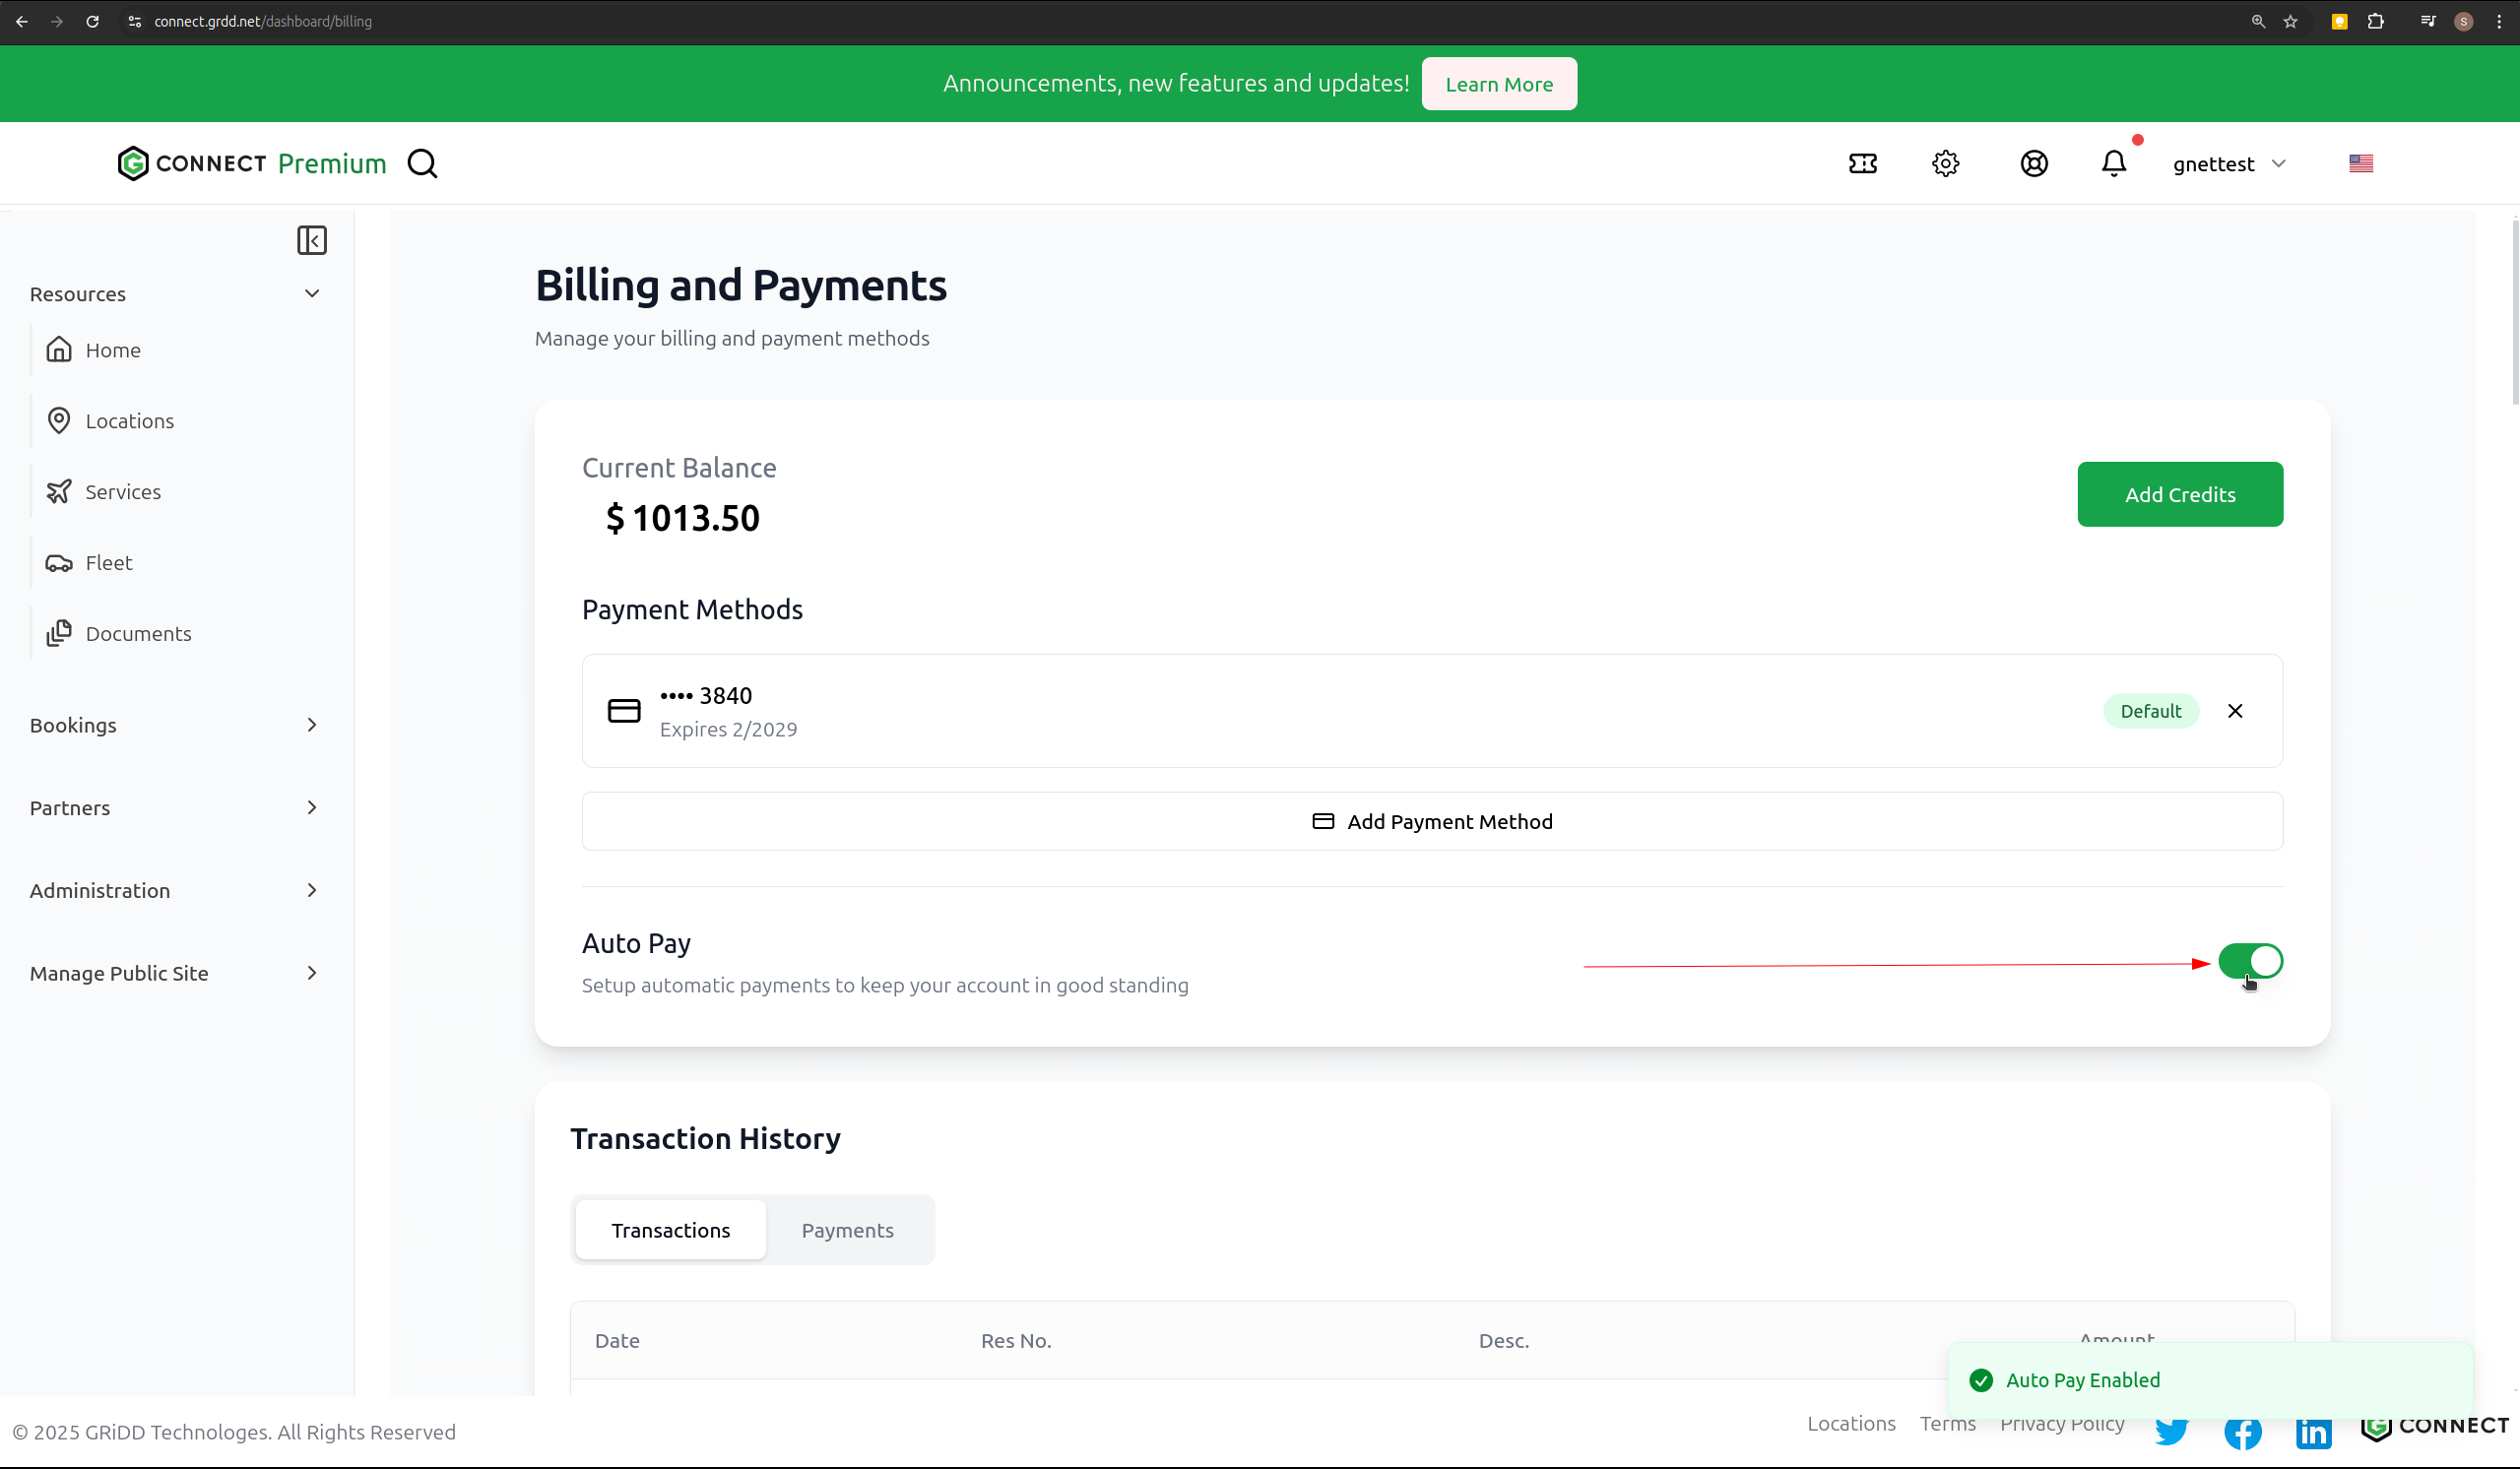
One-Time Payment
For users who prefer not to save payment information:- Choose “One-Time Payment”
- Enter payment details
- Complete transaction
- Card information won’t be stored
- You can add multiple payment methods to your account
- All payment information is securely encrypted
- Transaction history is available for your records