> ## Documentation Index
> Fetch the complete documentation index at: https://docs.grdd.dev/llms.txt
> Use this file to discover all available pages before exploring further.
# Adding Documents
> Step-by-step guide to add and manage your business documents
Welcome to the document management guide. This guide will walk you through the two methods of adding documents to your GNet Connect profile.
## Navigating to the Documents Page
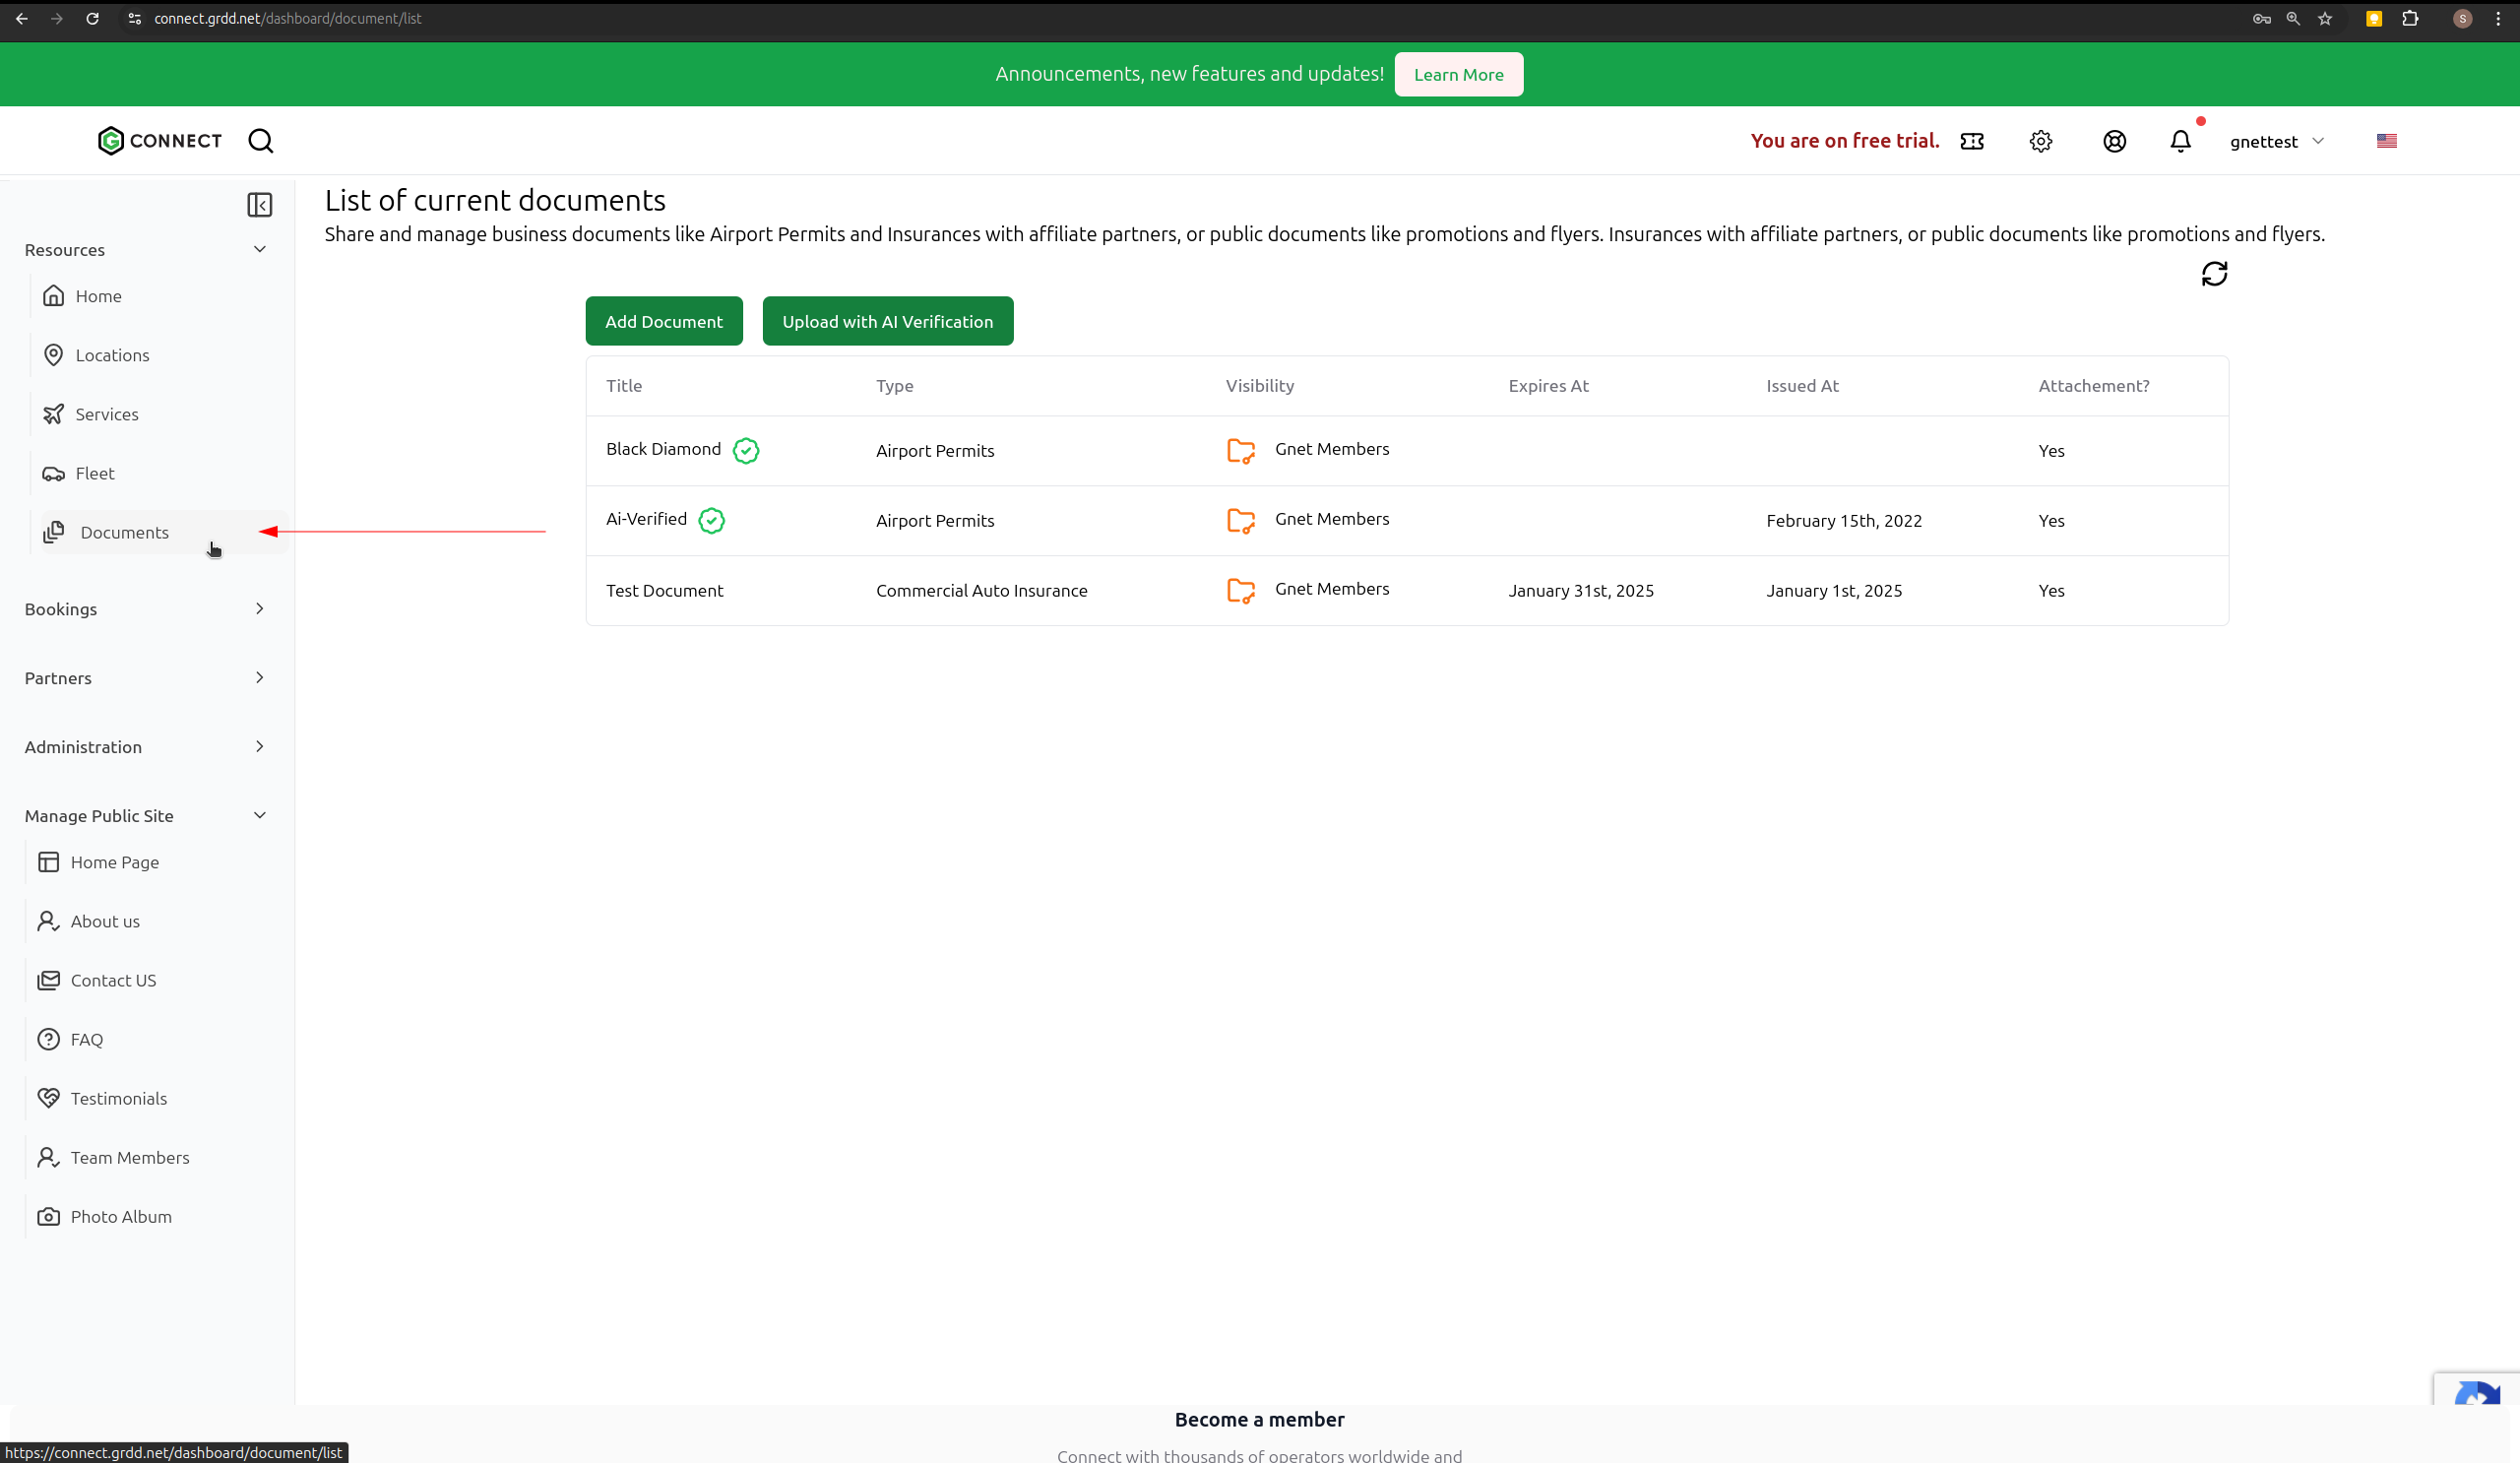
To add a document, you need to navigate to the Documents page. You can do this by clicking on the "Documents" tab in the left-hand side menu.
 ## Methods for Adding Documents
There are two ways to add documents to your system:
1. Manual document addition
2. AI-assisted document verification
## Method 1: Manual Document Addition
Follow these steps to manually add a document:
1. Navigate to your documents list
2. Click on "Add Document"
## Methods for Adding Documents
There are two ways to add documents to your system:
1. Manual document addition
2. AI-assisted document verification
## Method 1: Manual Document Addition
Follow these steps to manually add a document:
1. Navigate to your documents list
2. Click on "Add Document"
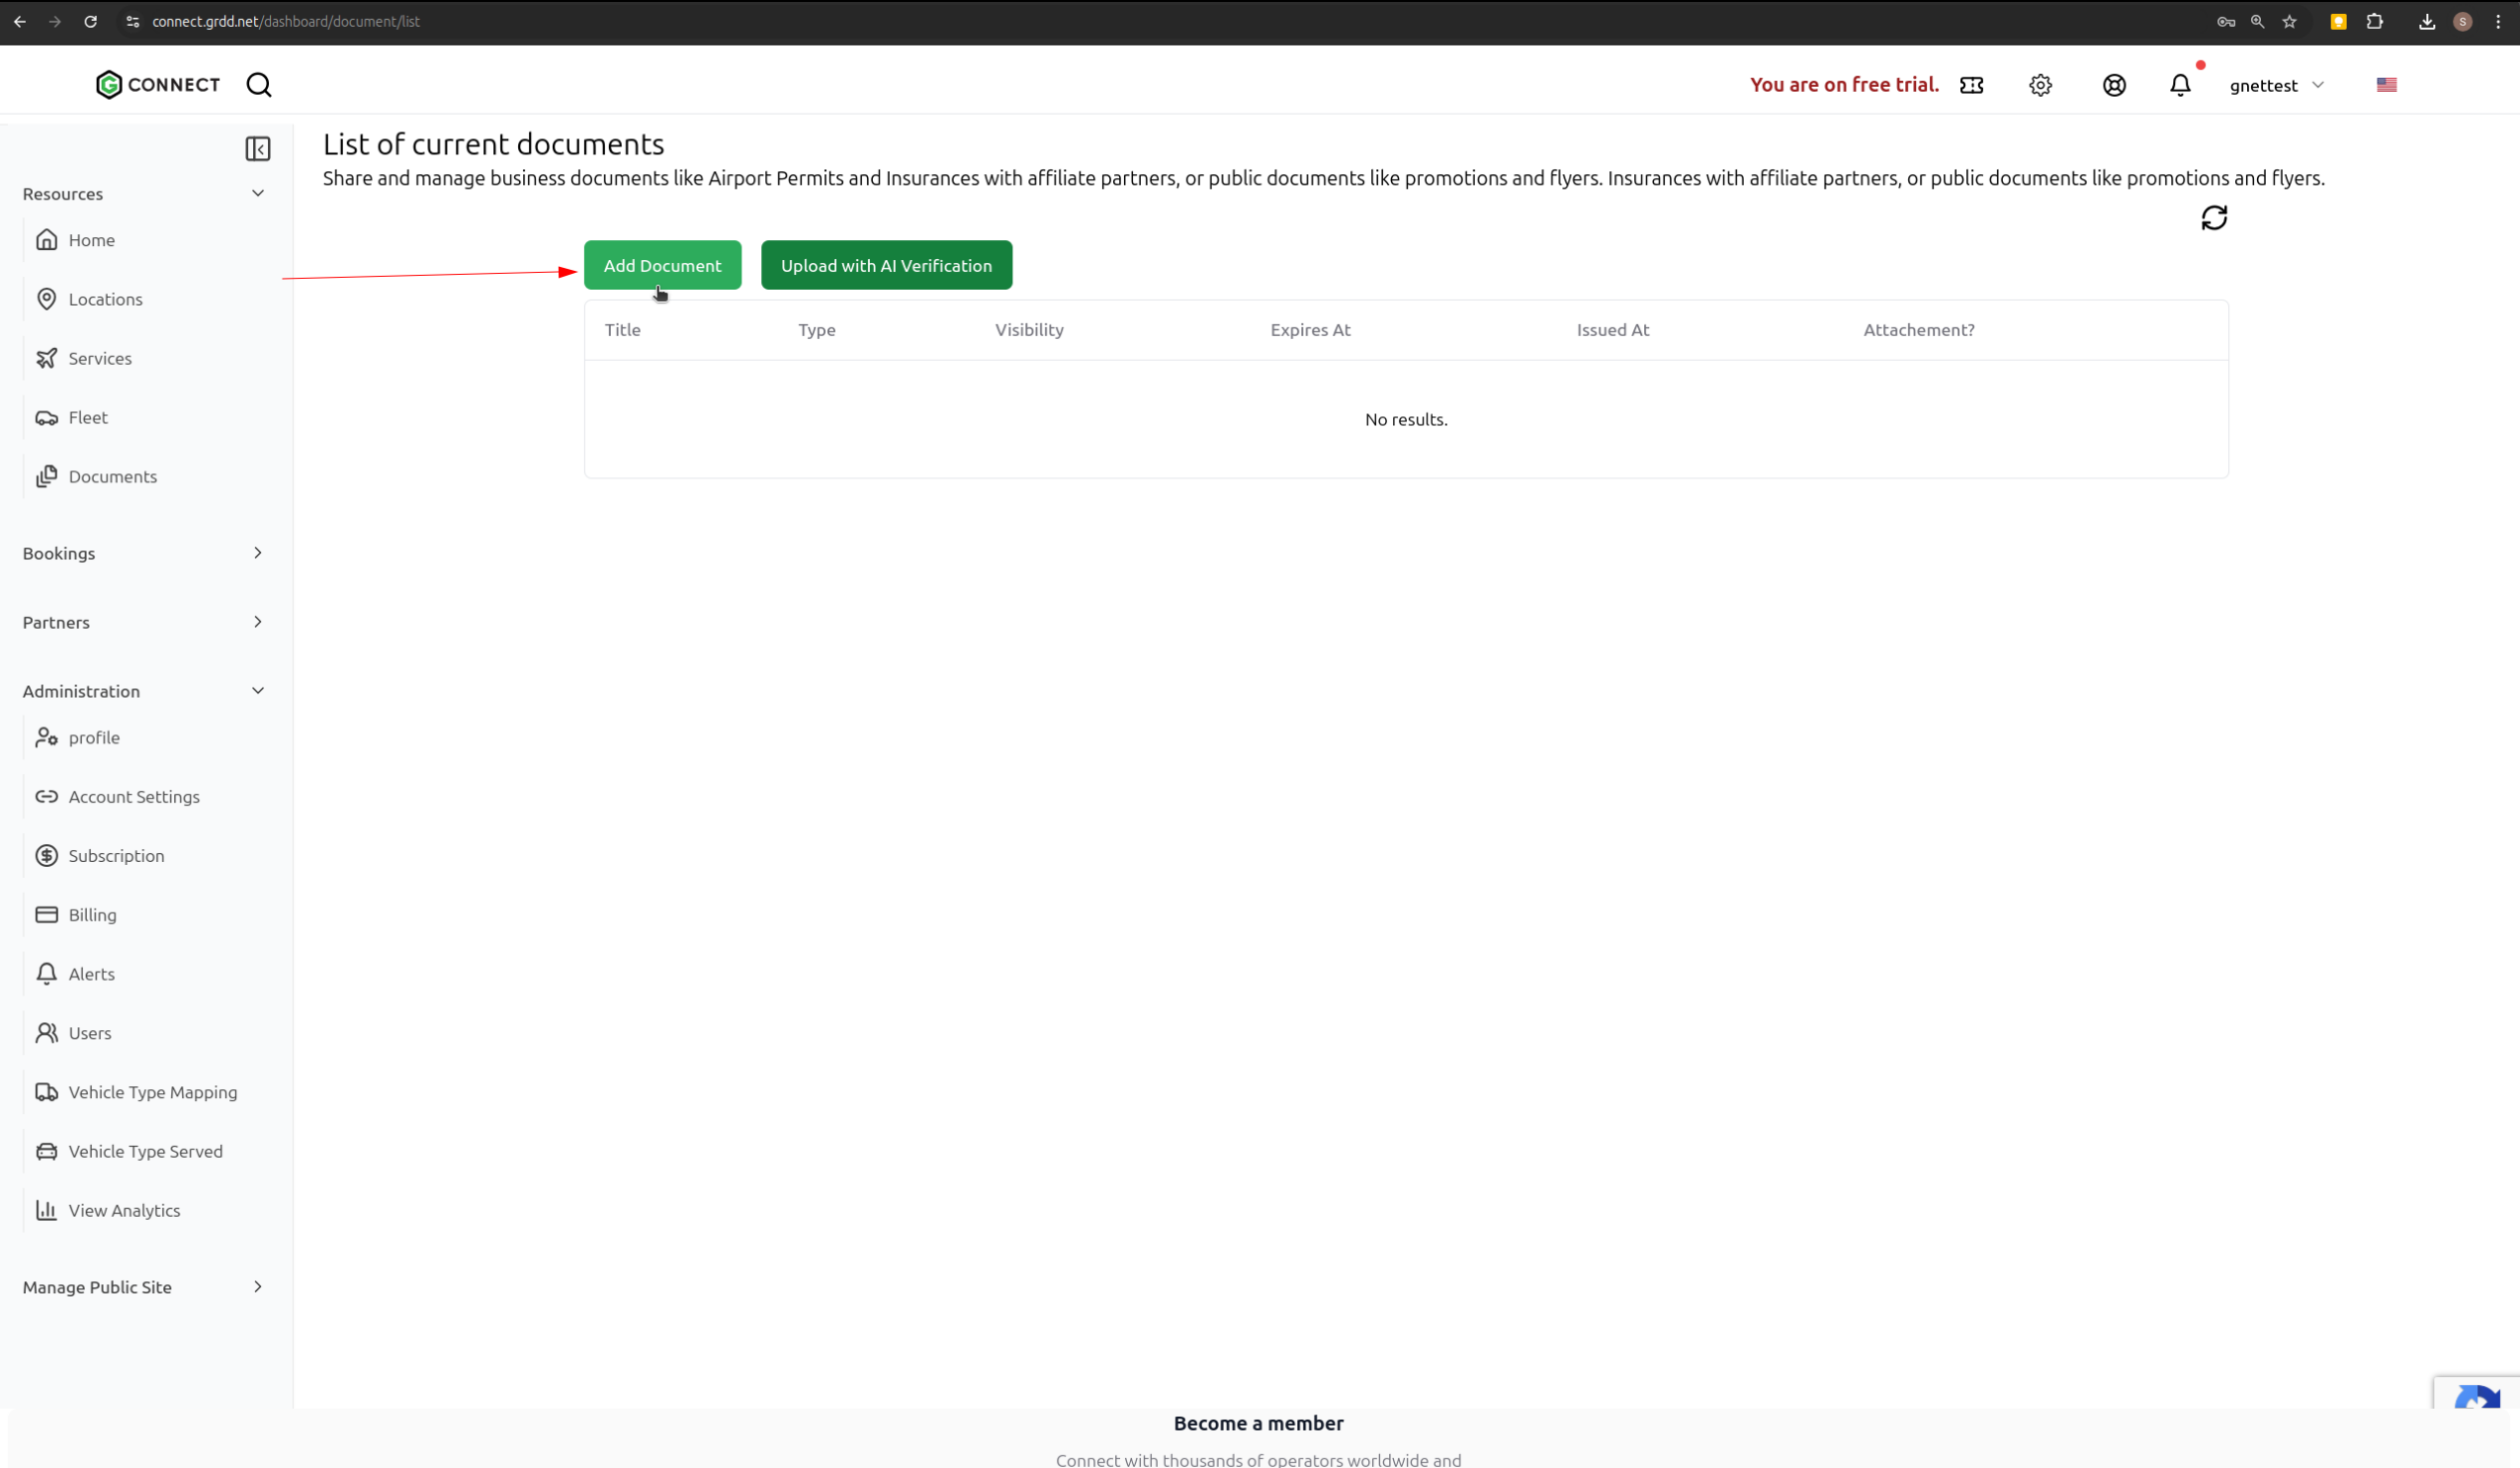 3. Fill in the required document details:
* Name
* Document Type
* Visibility Level (controls document access)
* Issue Date
* Expiry Date
* Issued To
* Issuer
* Description
4. Click "Save" to create the document entry
3. Fill in the required document details:
* Name
* Document Type
* Visibility Level (controls document access)
* Issue Date
* Expiry Date
* Issued To
* Issuer
* Description
4. Click "Save" to create the document entry
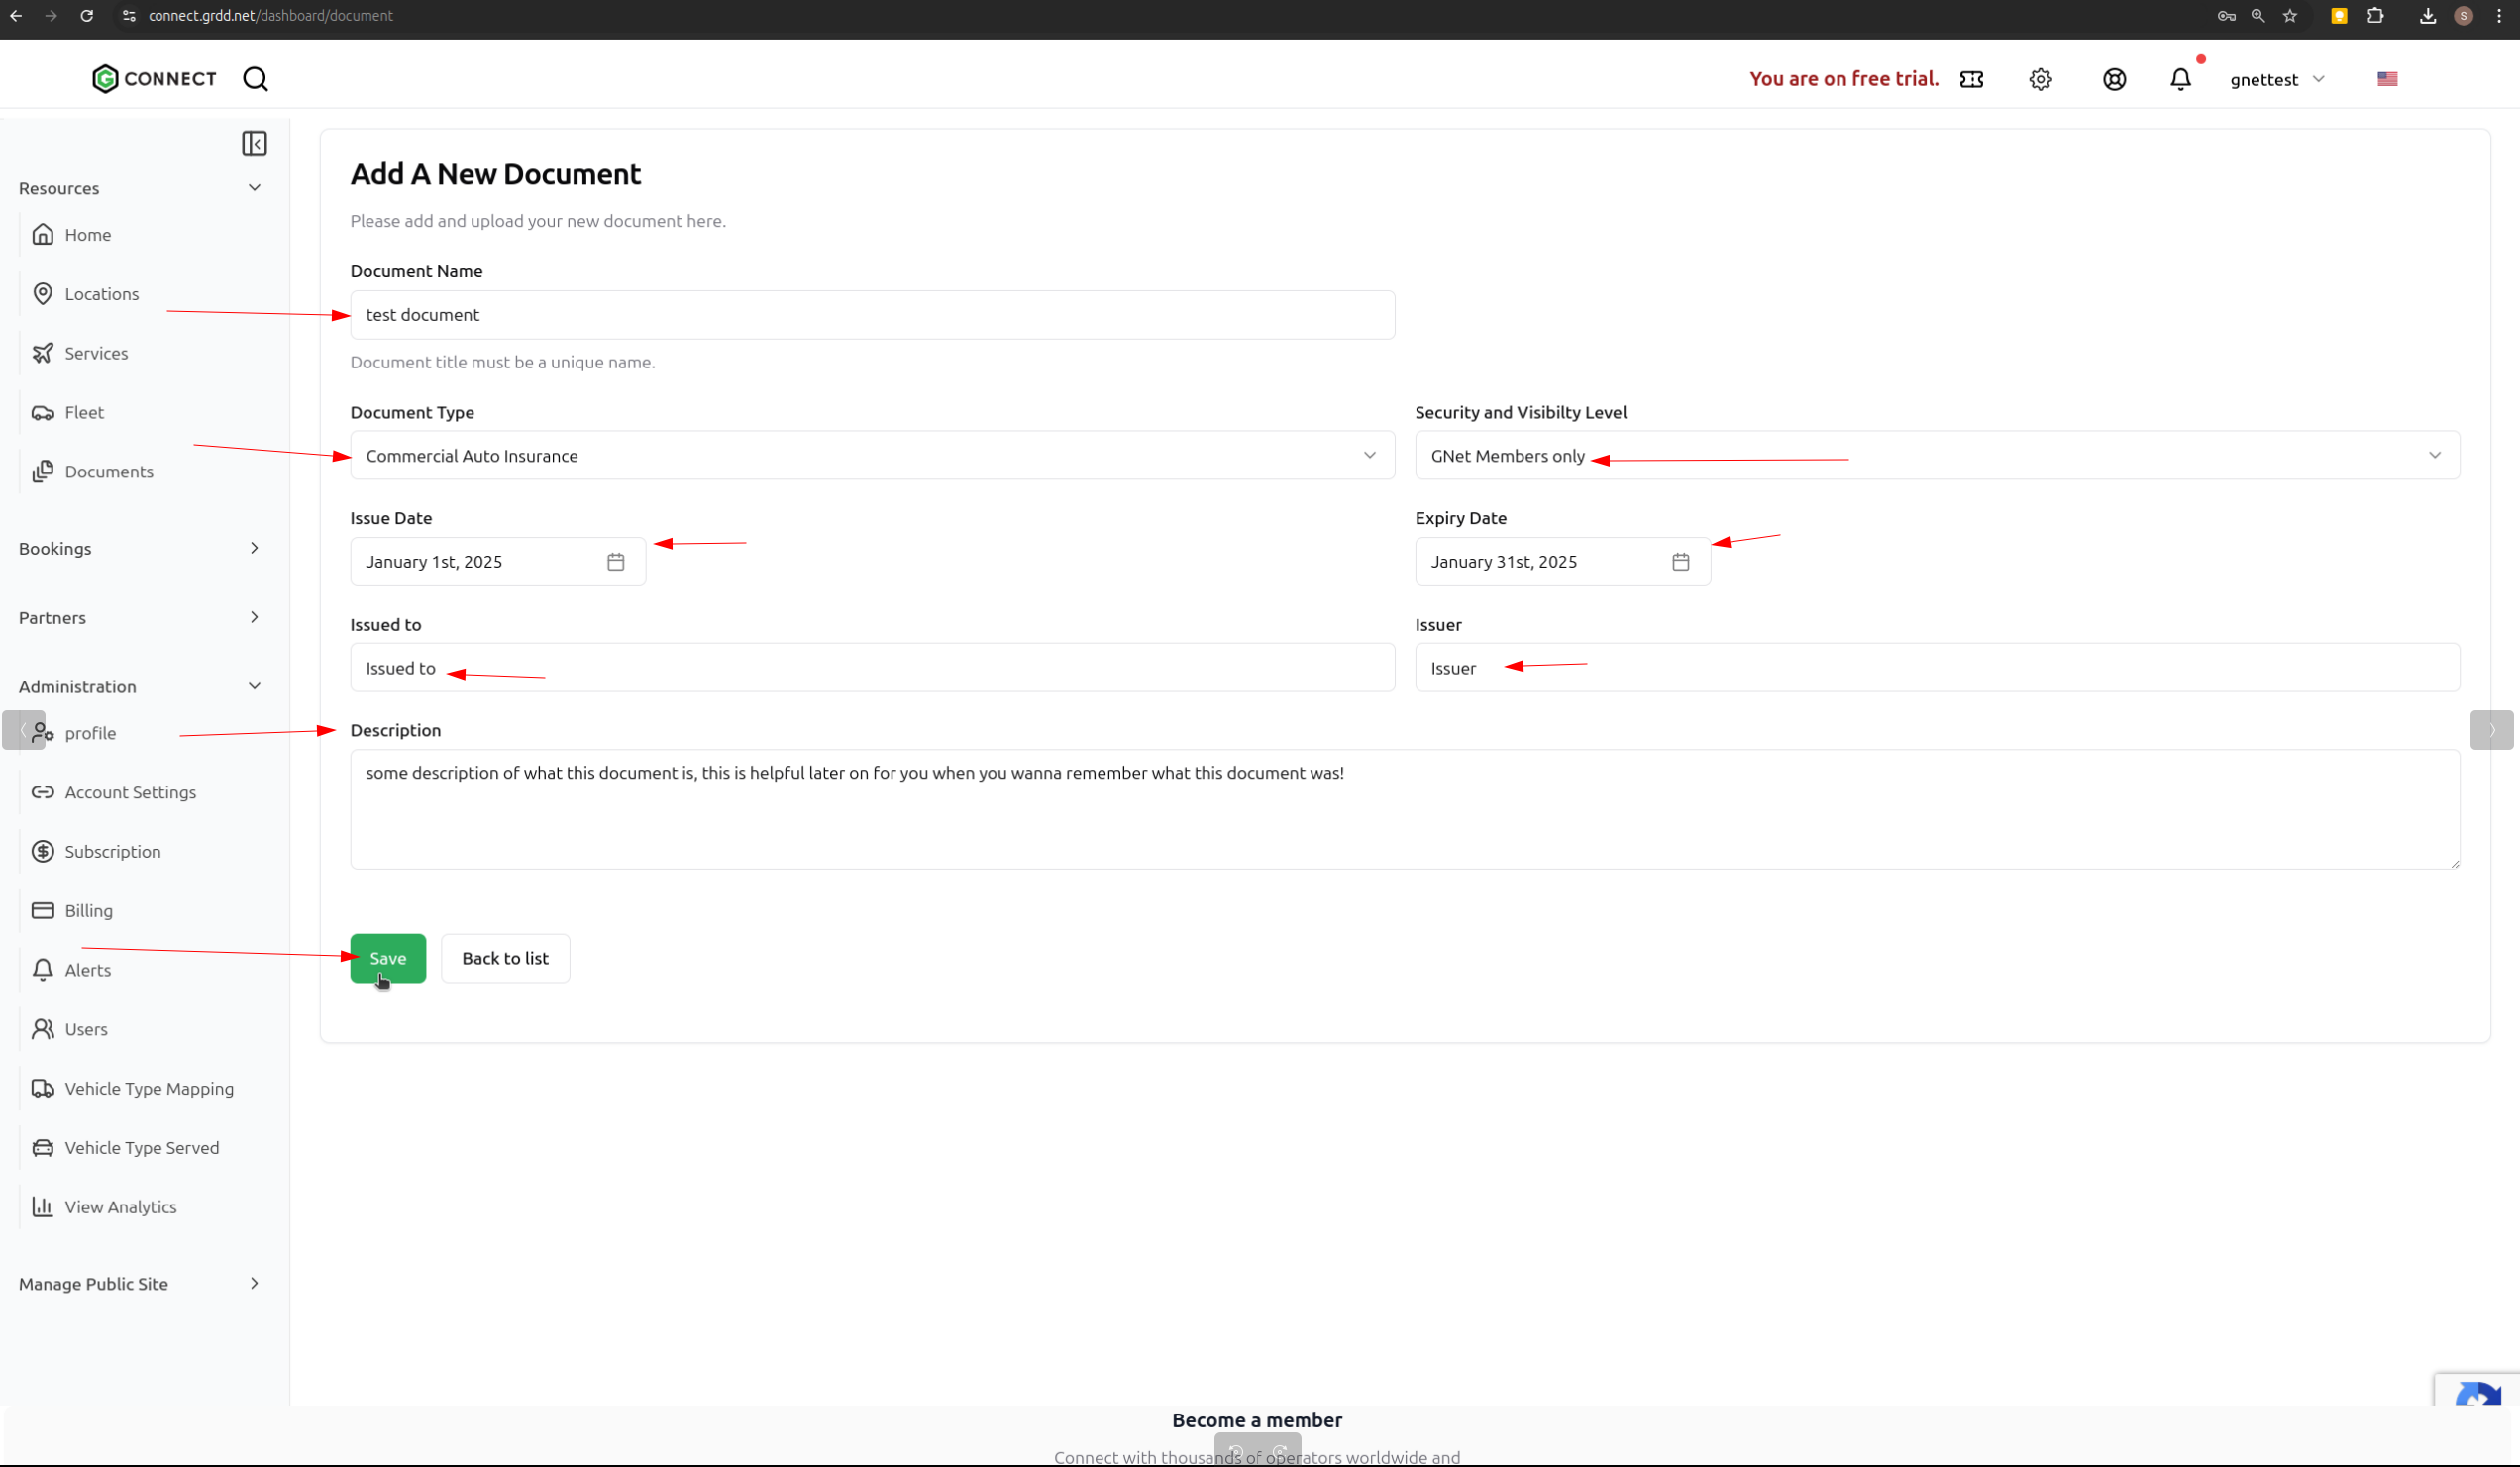 5. Upload your document file
 The manual method gives you complete control over document details but requires you to enter all information yourself.
## Method 2: AI-Assisted Verification
For automated document processing and verification:
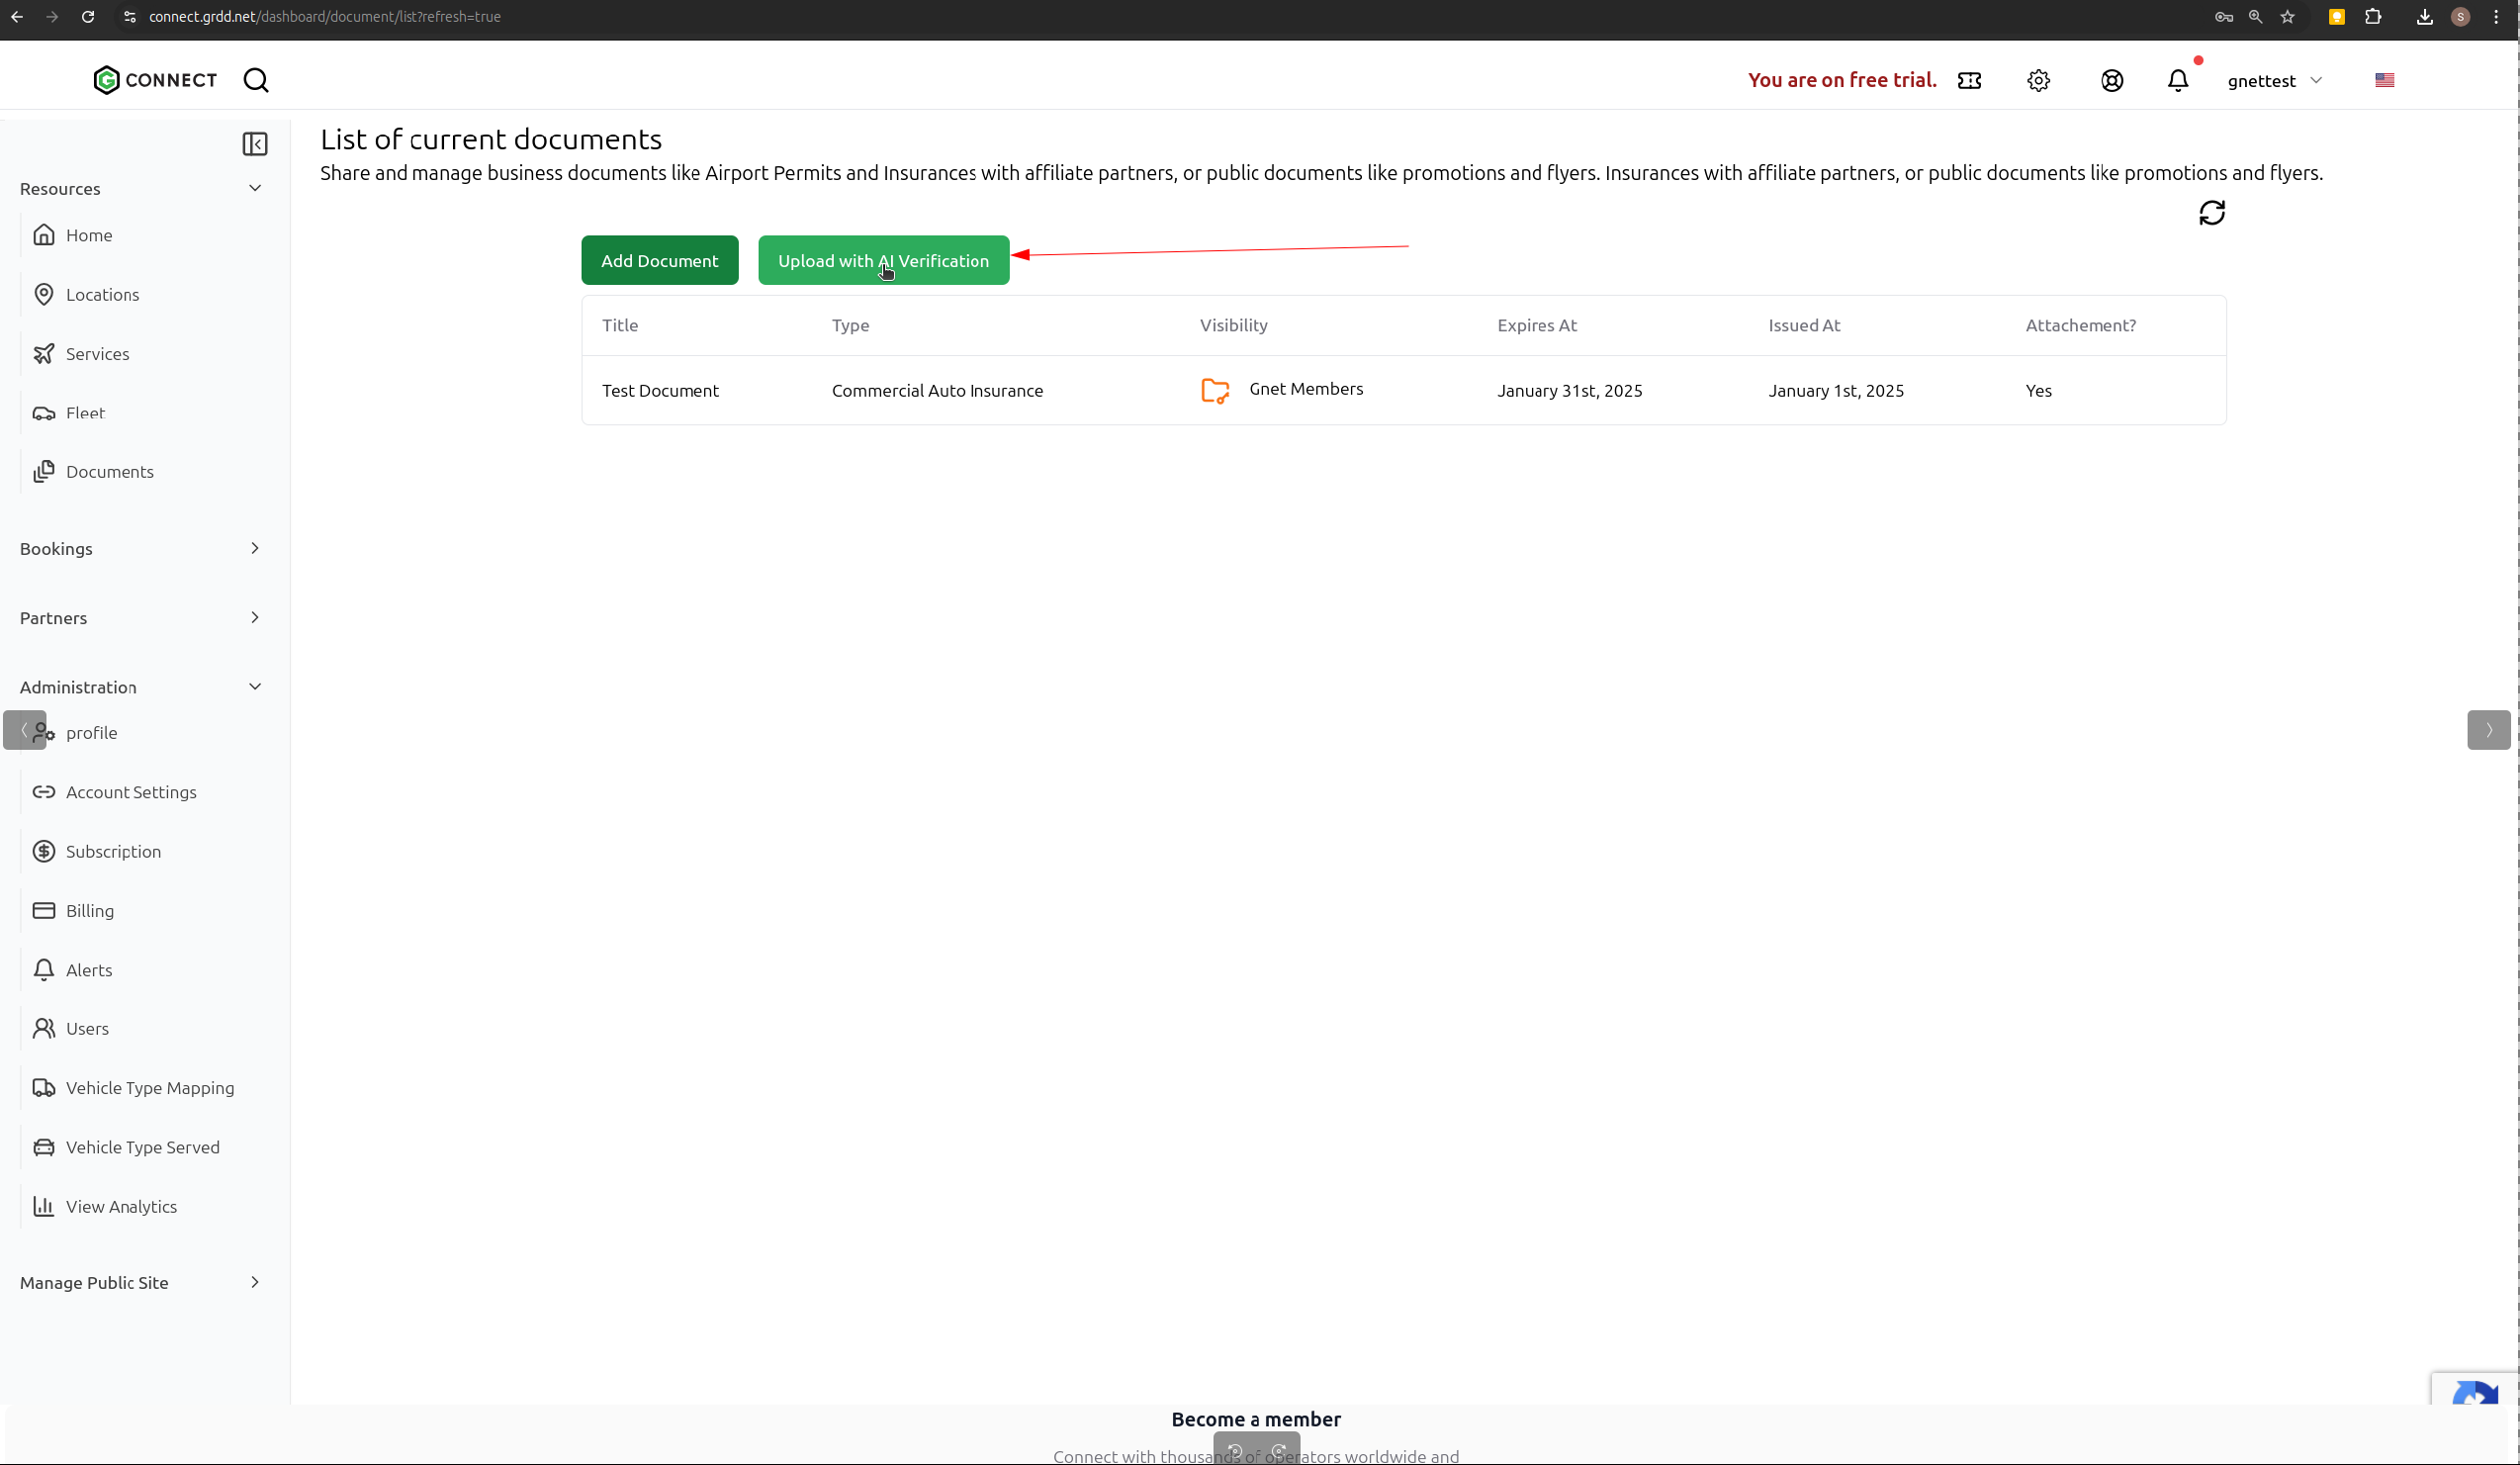
1. Navigate to your documents list
2. Click "Upload with AI Verification"
The manual method gives you complete control over document details but requires you to enter all information yourself.
## Method 2: AI-Assisted Verification
For automated document processing and verification:
1. Navigate to your documents list
2. Click "Upload with AI Verification"
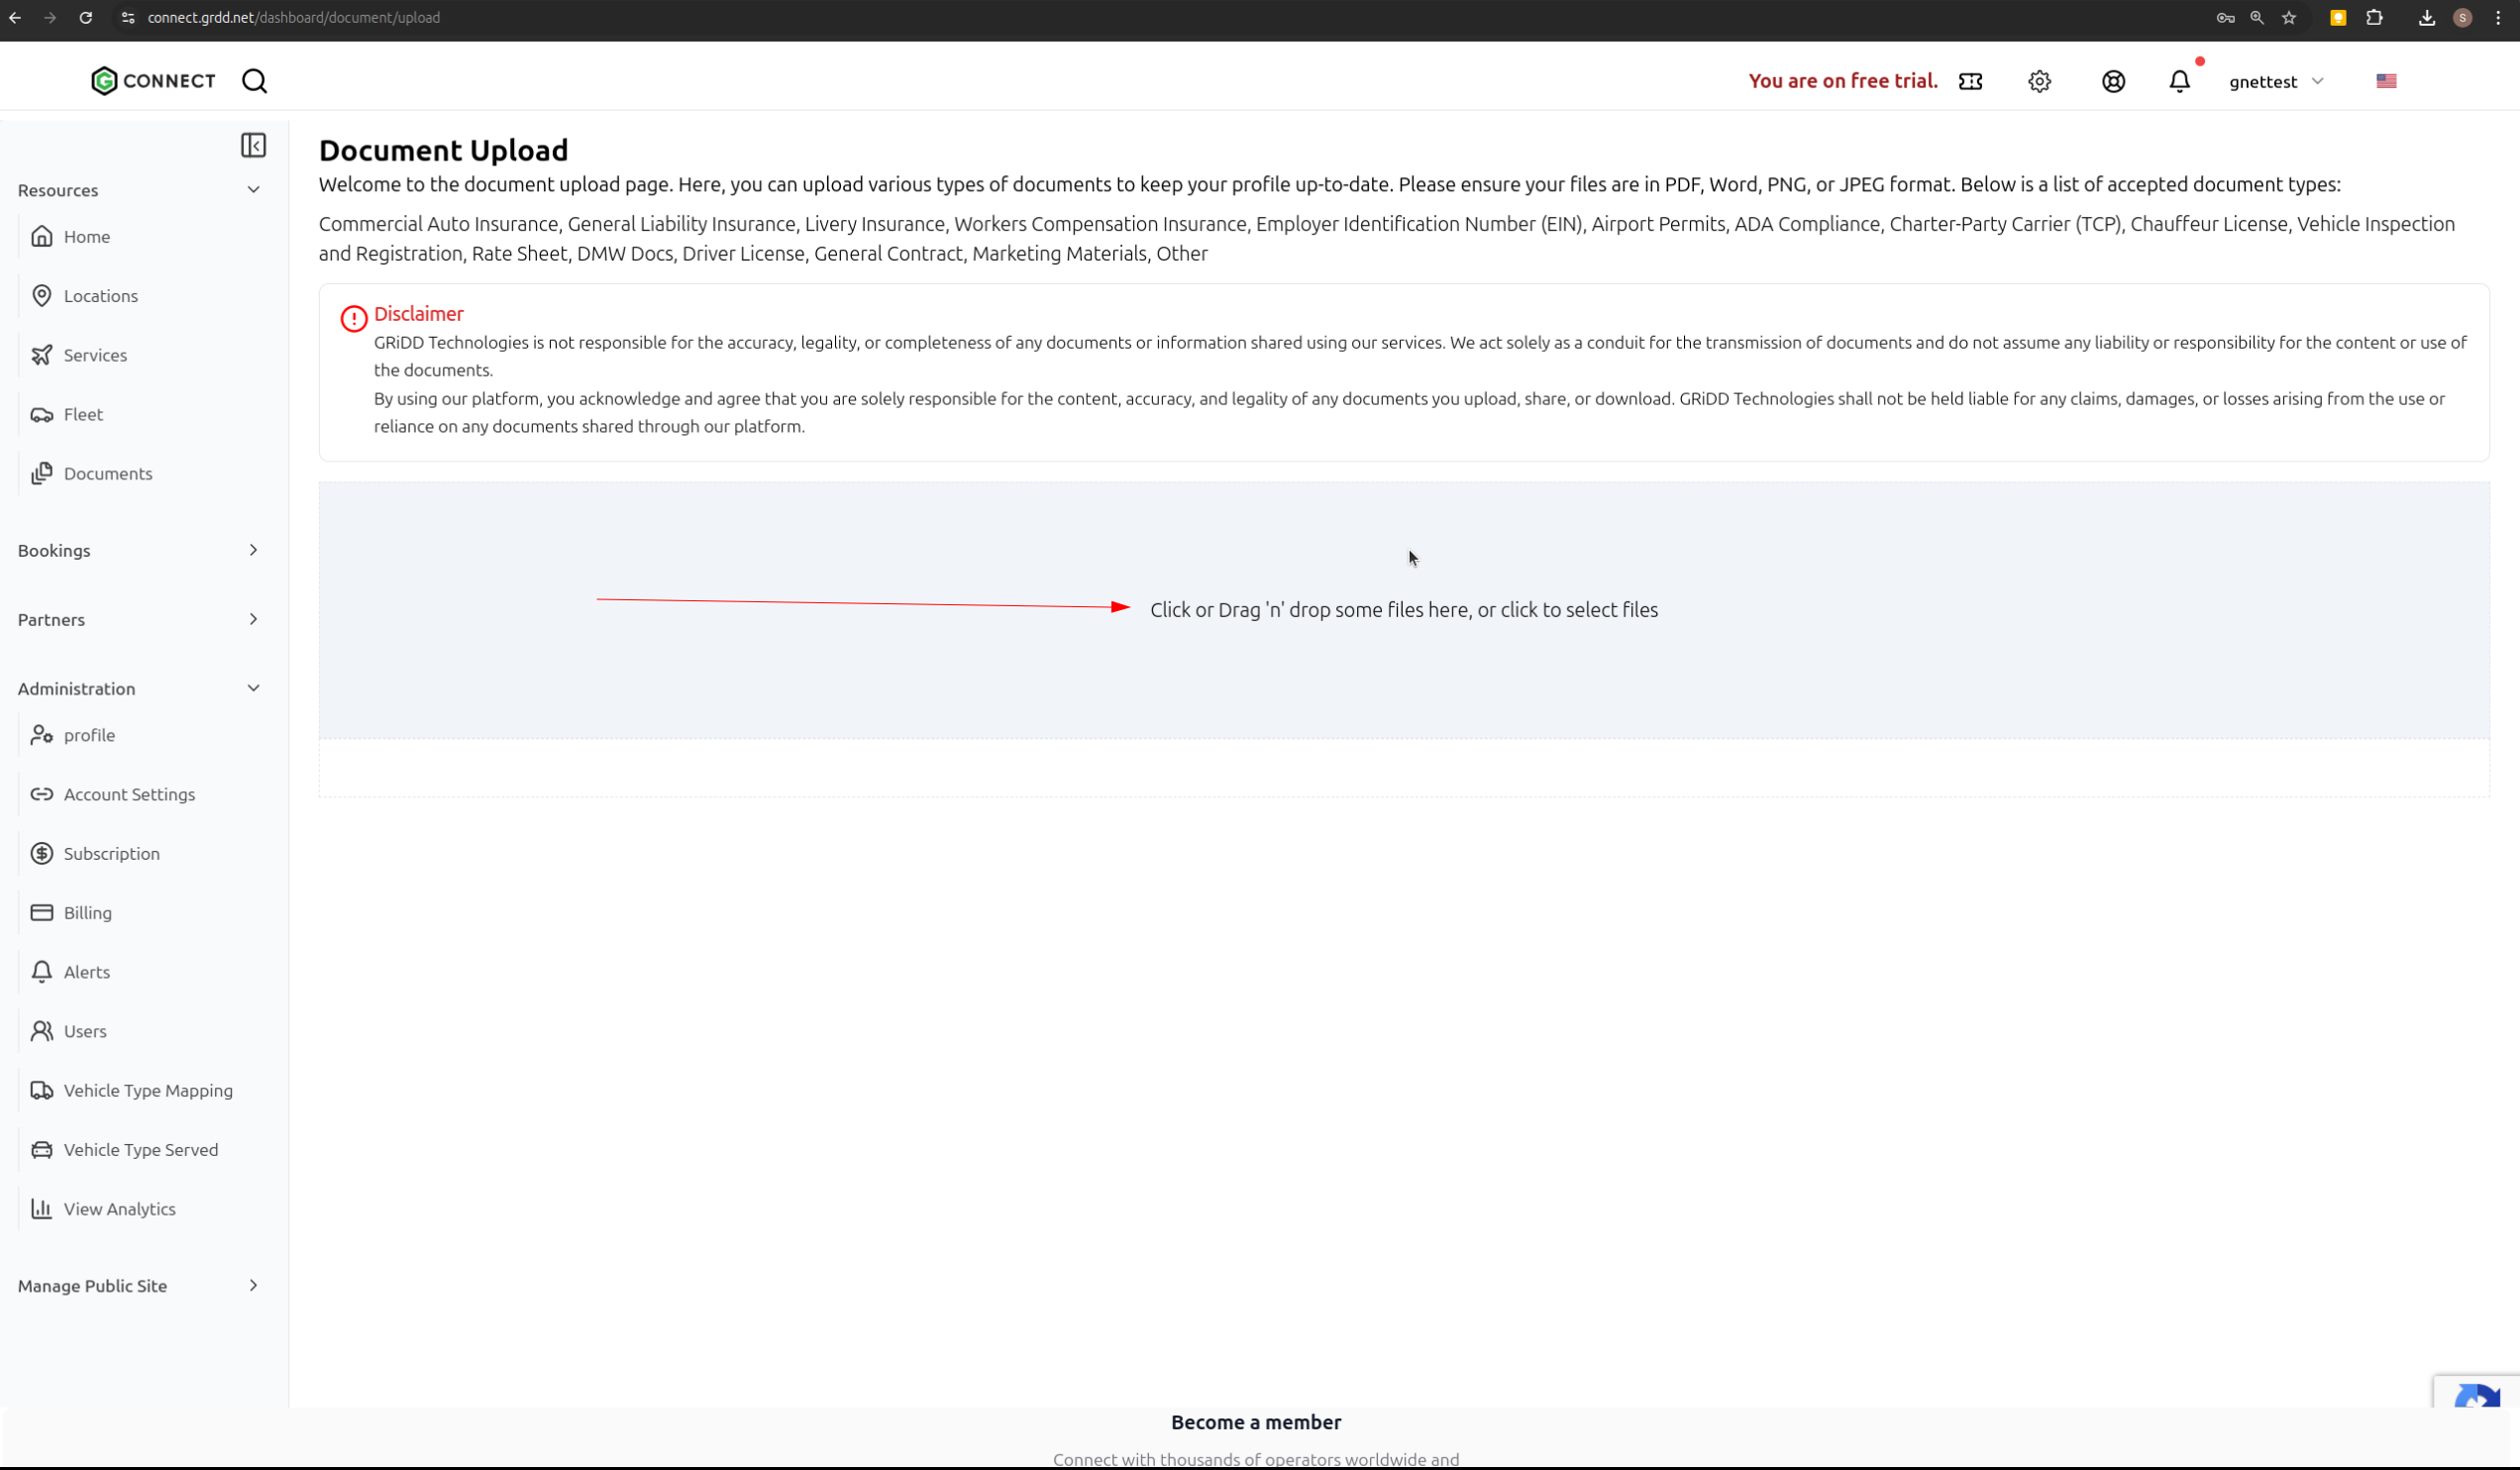
 3. Upload your document file
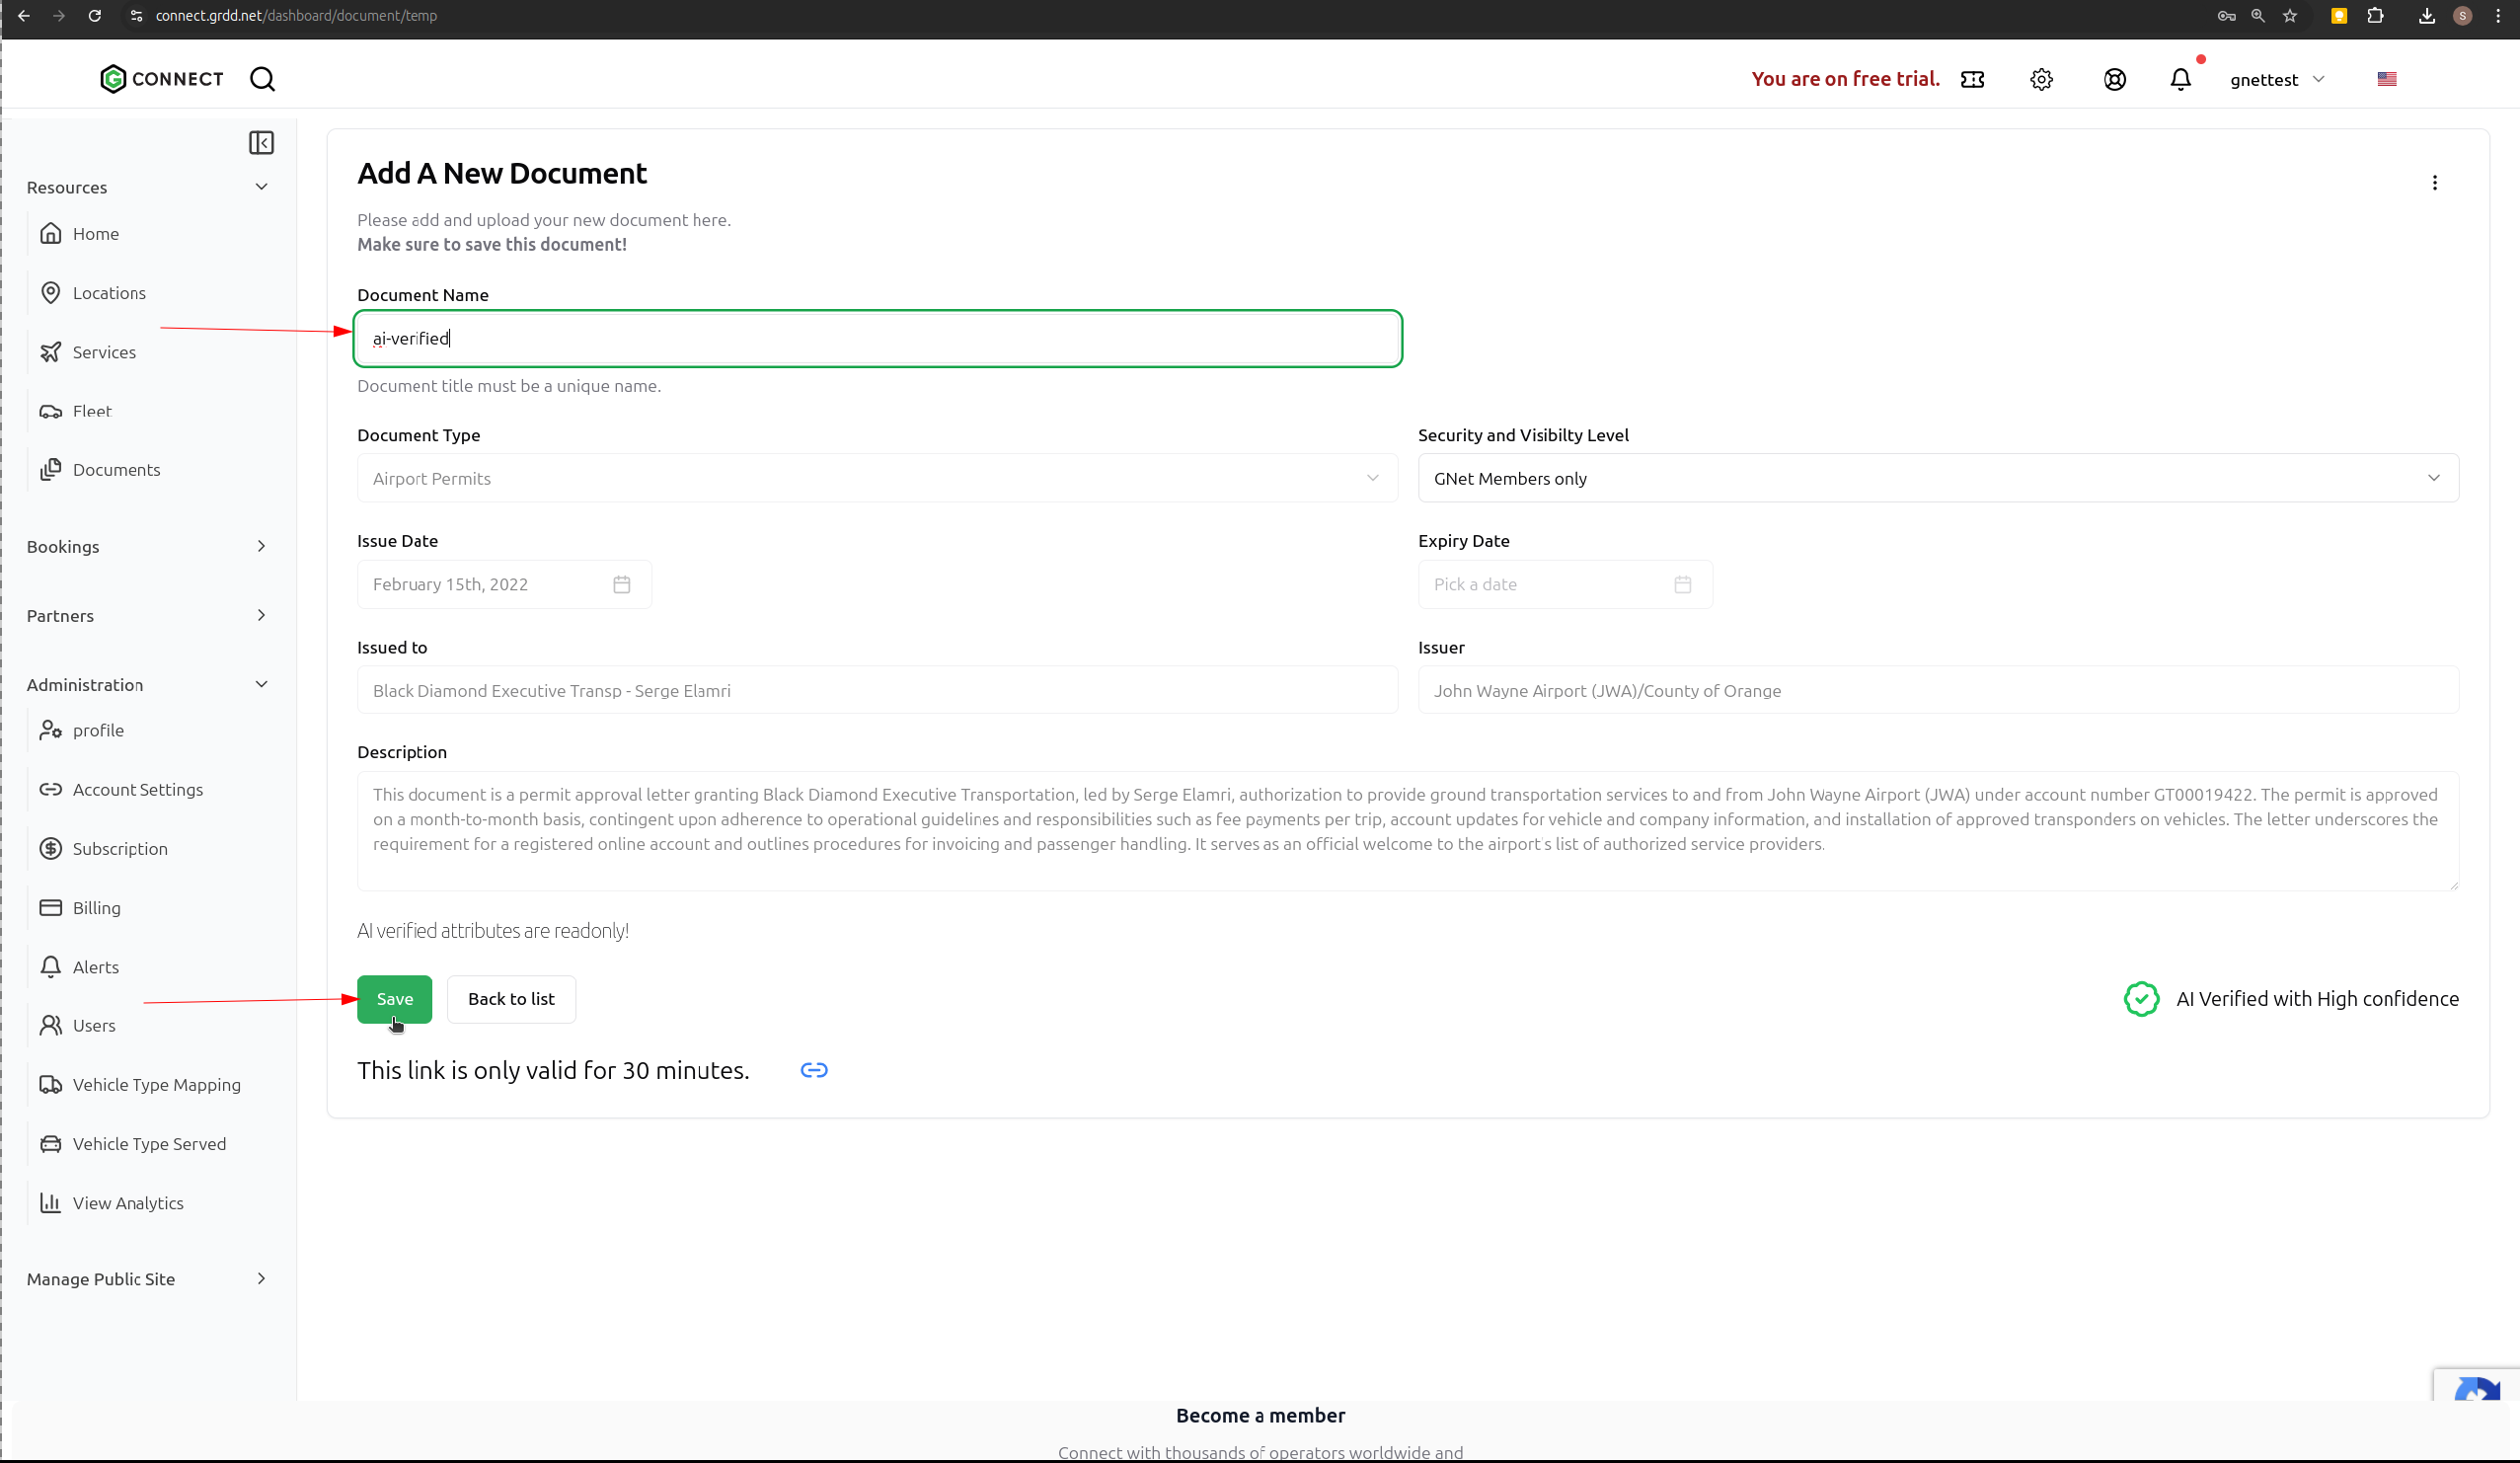
 4. The AI will automatically extract and verify document details
5. Review the extracted information
6. Set your preferred:
* Document Name
* Visibility Level
7. Click "Save" to complete the process
4. The AI will automatically extract and verify document details
5. Review the extracted information
6. Set your preferred:
* Document Name
* Visibility Level
7. Click "Save" to complete the process
 The AI verification method saves time by automatically extracting document information and verifying its authenticity.
## Document Visibility Levels
When adding documents, you can set different visibility levels to control access:
* Private - Only visible to your organization
* Public - Visible to all GNet Connect users
* Selected Partners - Visible only to chosen business partners
Always verify the visibility level before saving sensitive documents to ensure proper access control.
The AI verification method saves time by automatically extracting document information and verifying its authenticity.
## Document Visibility Levels
When adding documents, you can set different visibility levels to control access:
* Private - Only visible to your organization
* Public - Visible to all GNet Connect users
* Selected Partners - Visible only to chosen business partners
Always verify the visibility level before saving sensitive documents to ensure proper access control.