> ## Documentation Index
> Fetch the complete documentation index at: https://docs.grdd.dev/llms.txt
> Use this file to discover all available pages before exploring further.
# Managing Payments
> Step-by-step guide to add and manage payment methods
Welcome to the payment management guide. Follow these steps to add payment methods and manage your billing in GNet Connect.
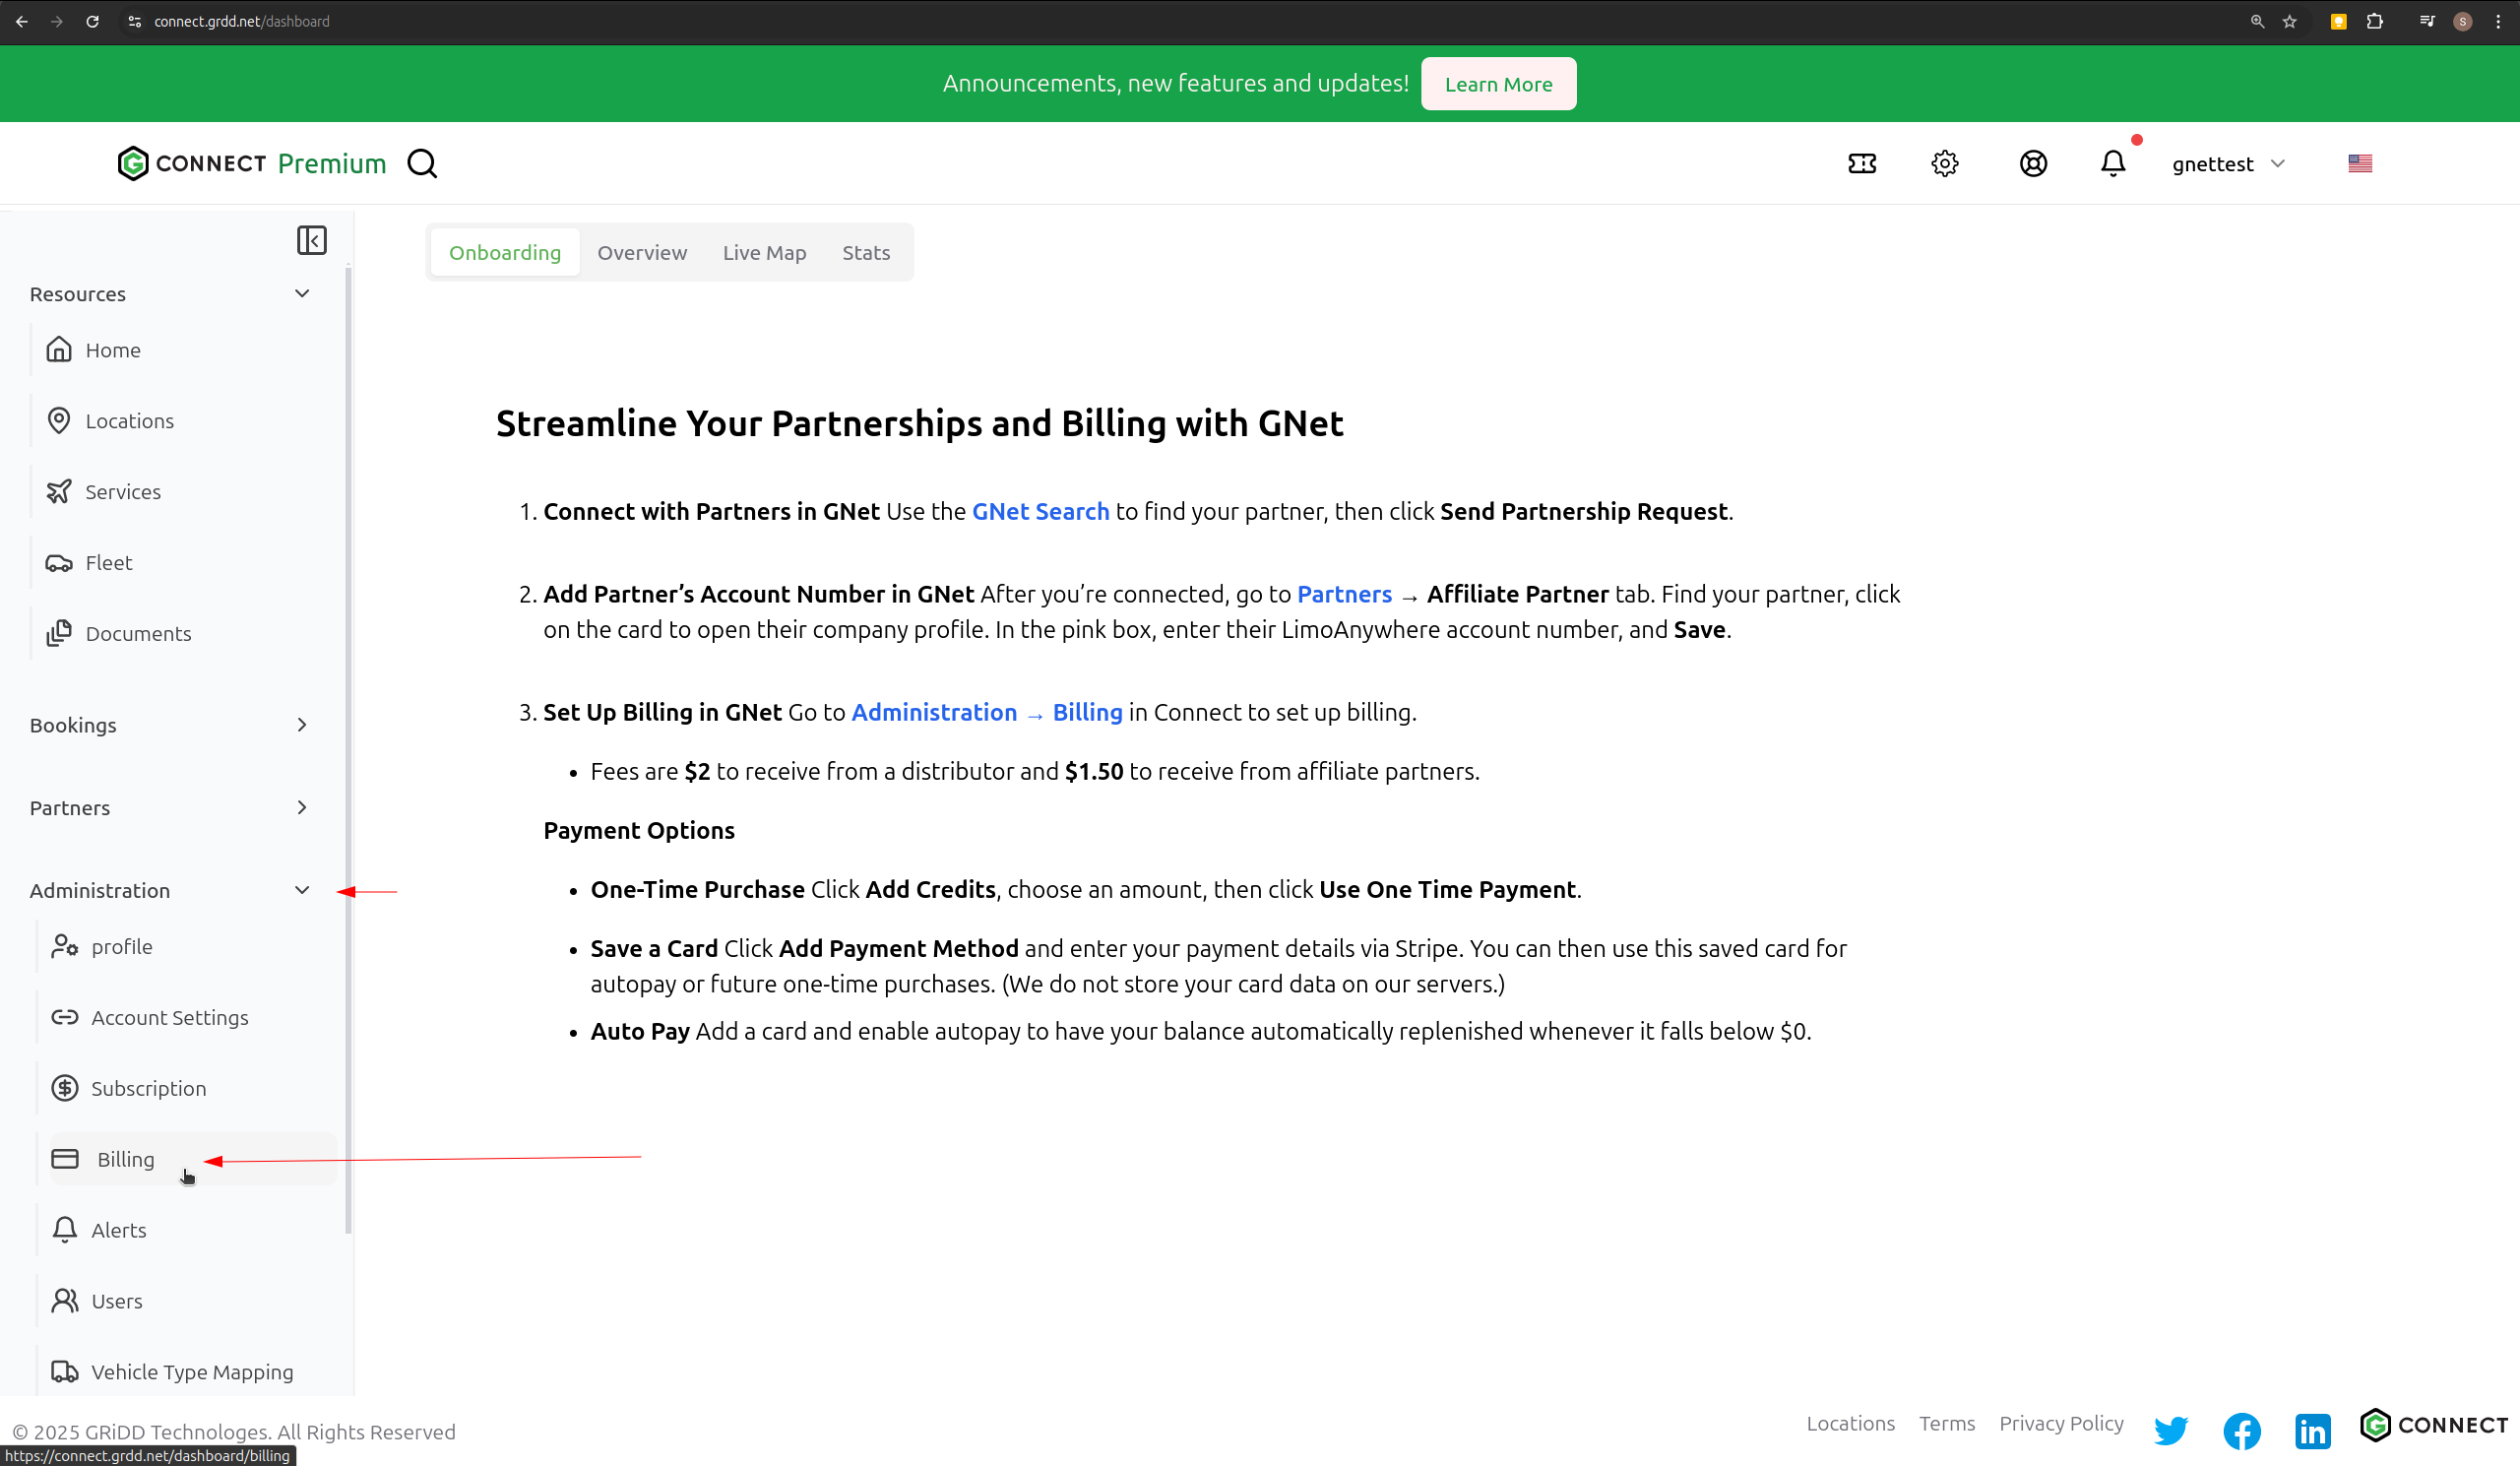
## Step 1: Access Billing Section
Navigate to your dashboard and click on "Billing" under the Administration tab in the left panel.
```md theme={null}

```
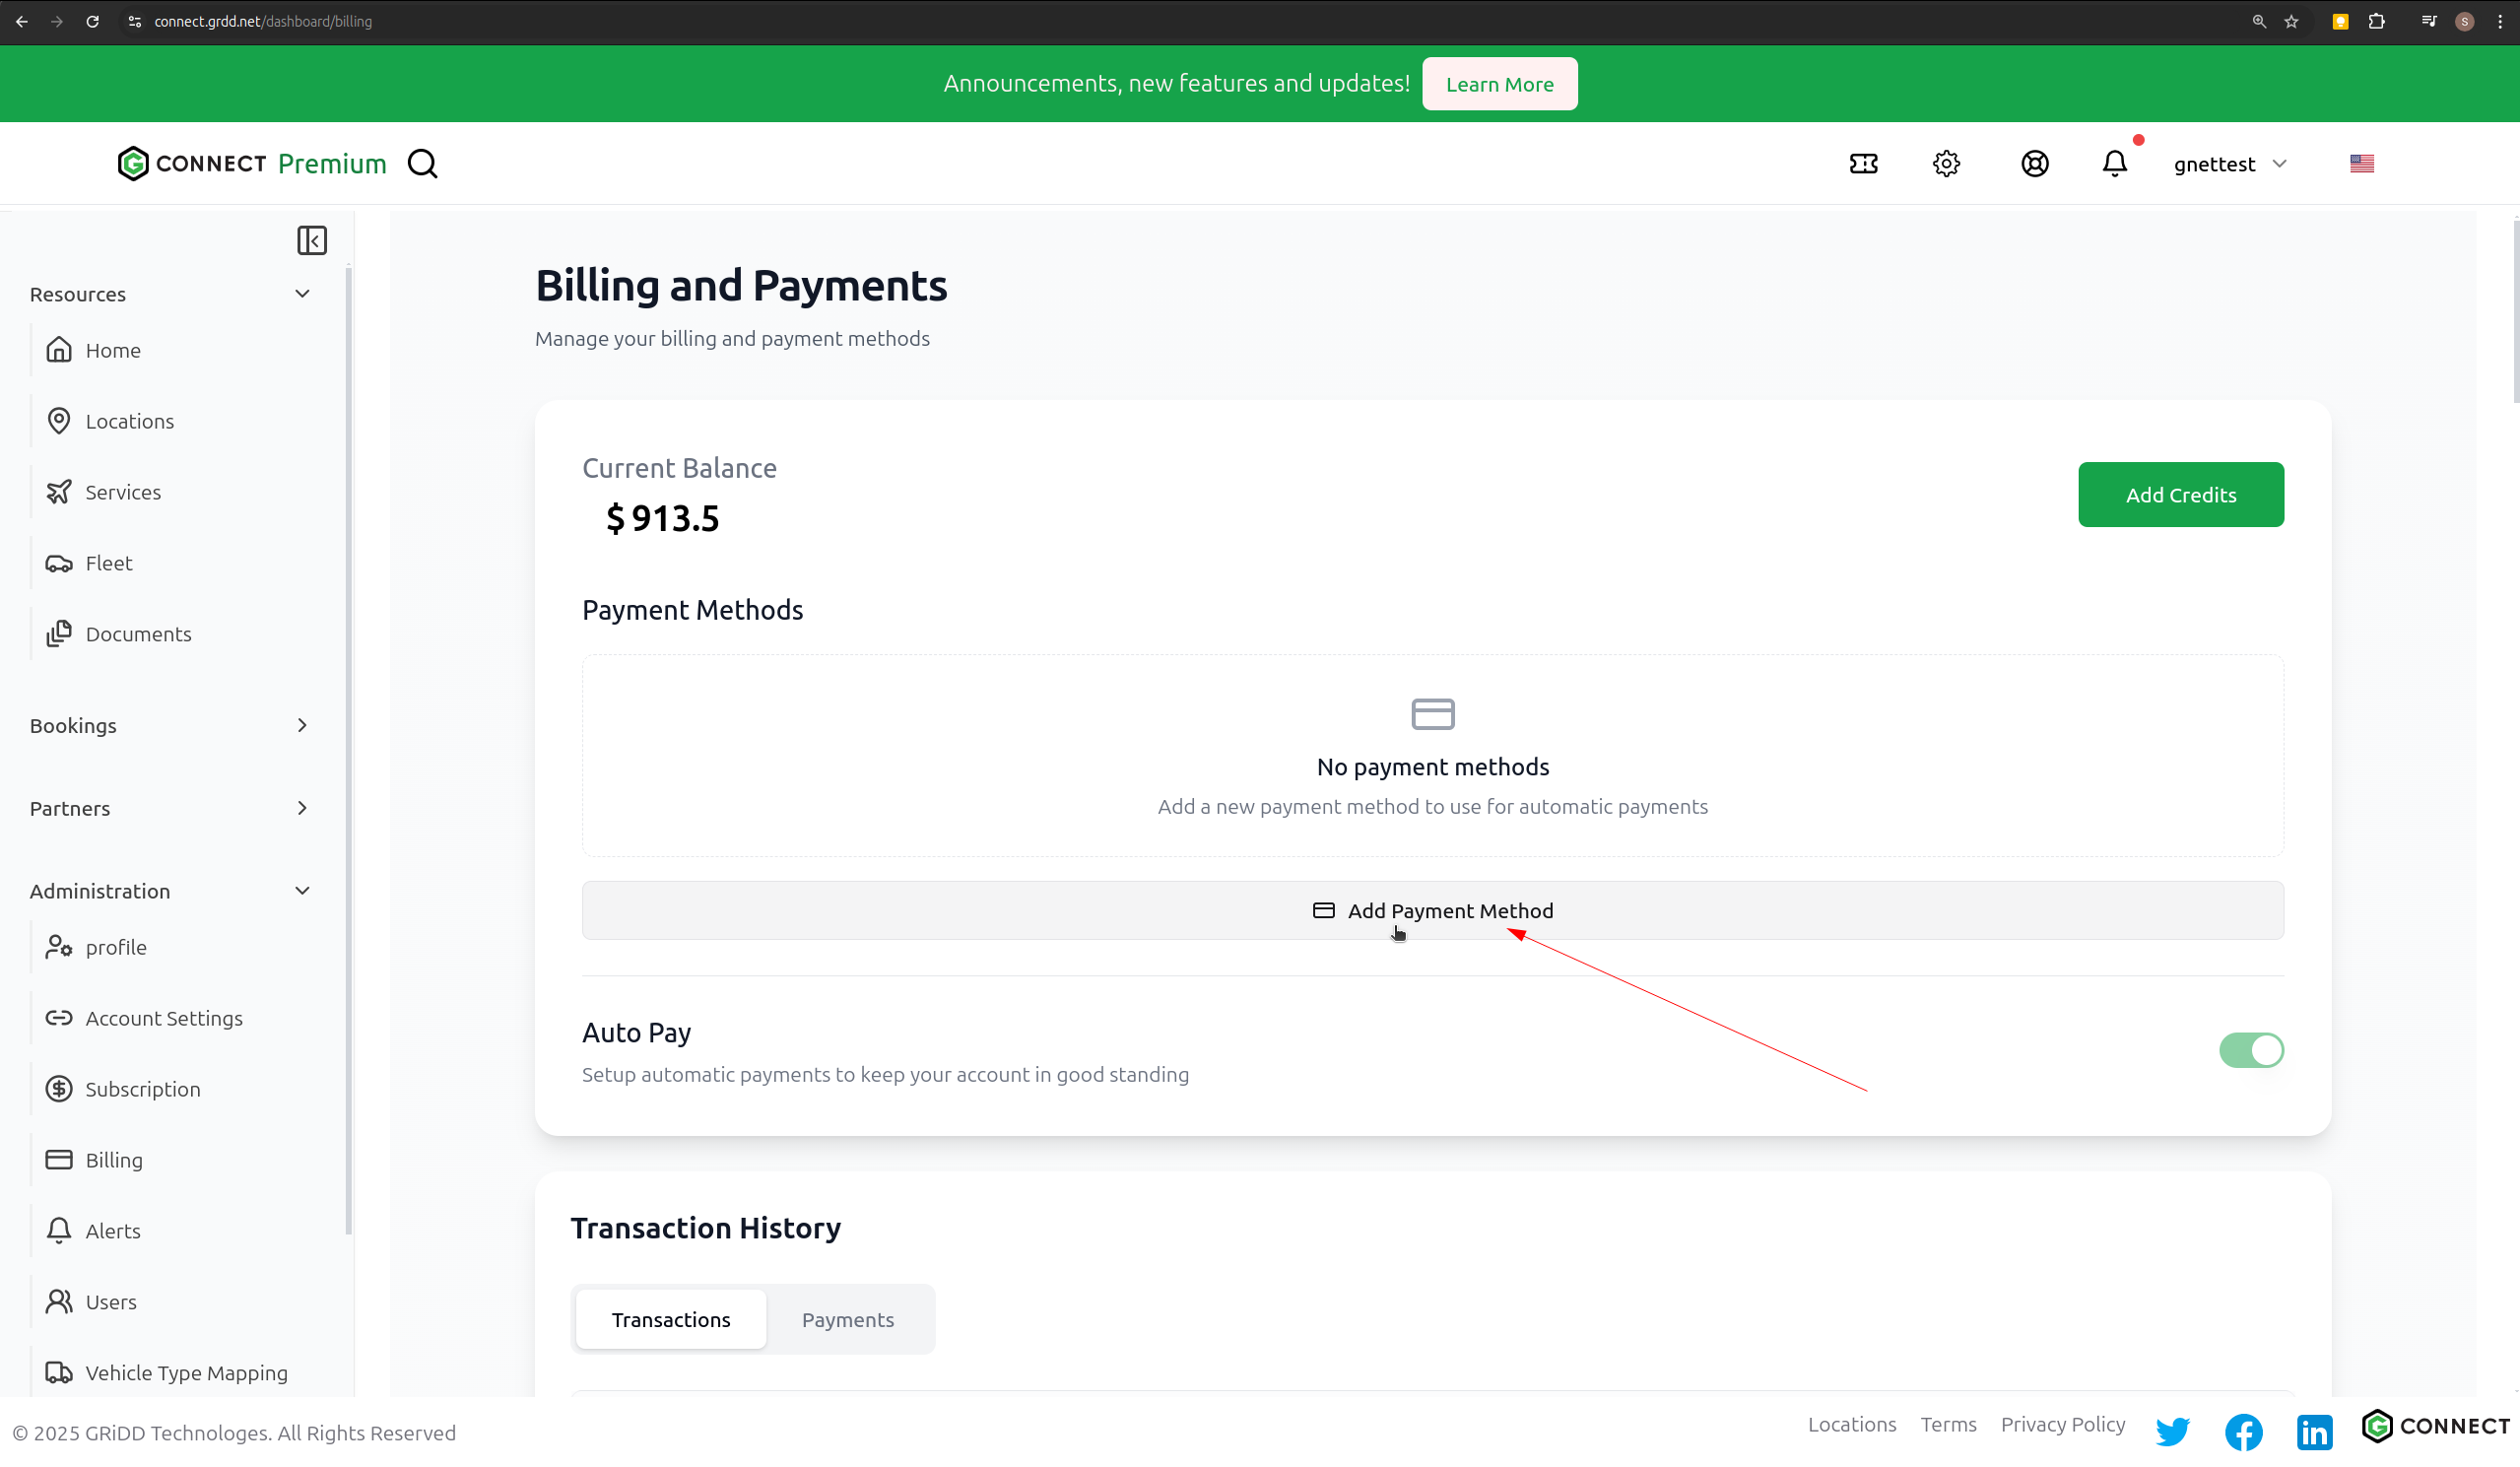
## Step 2: Add Payment Method
Click on "Add Payment Method" to begin setting up your payment information.
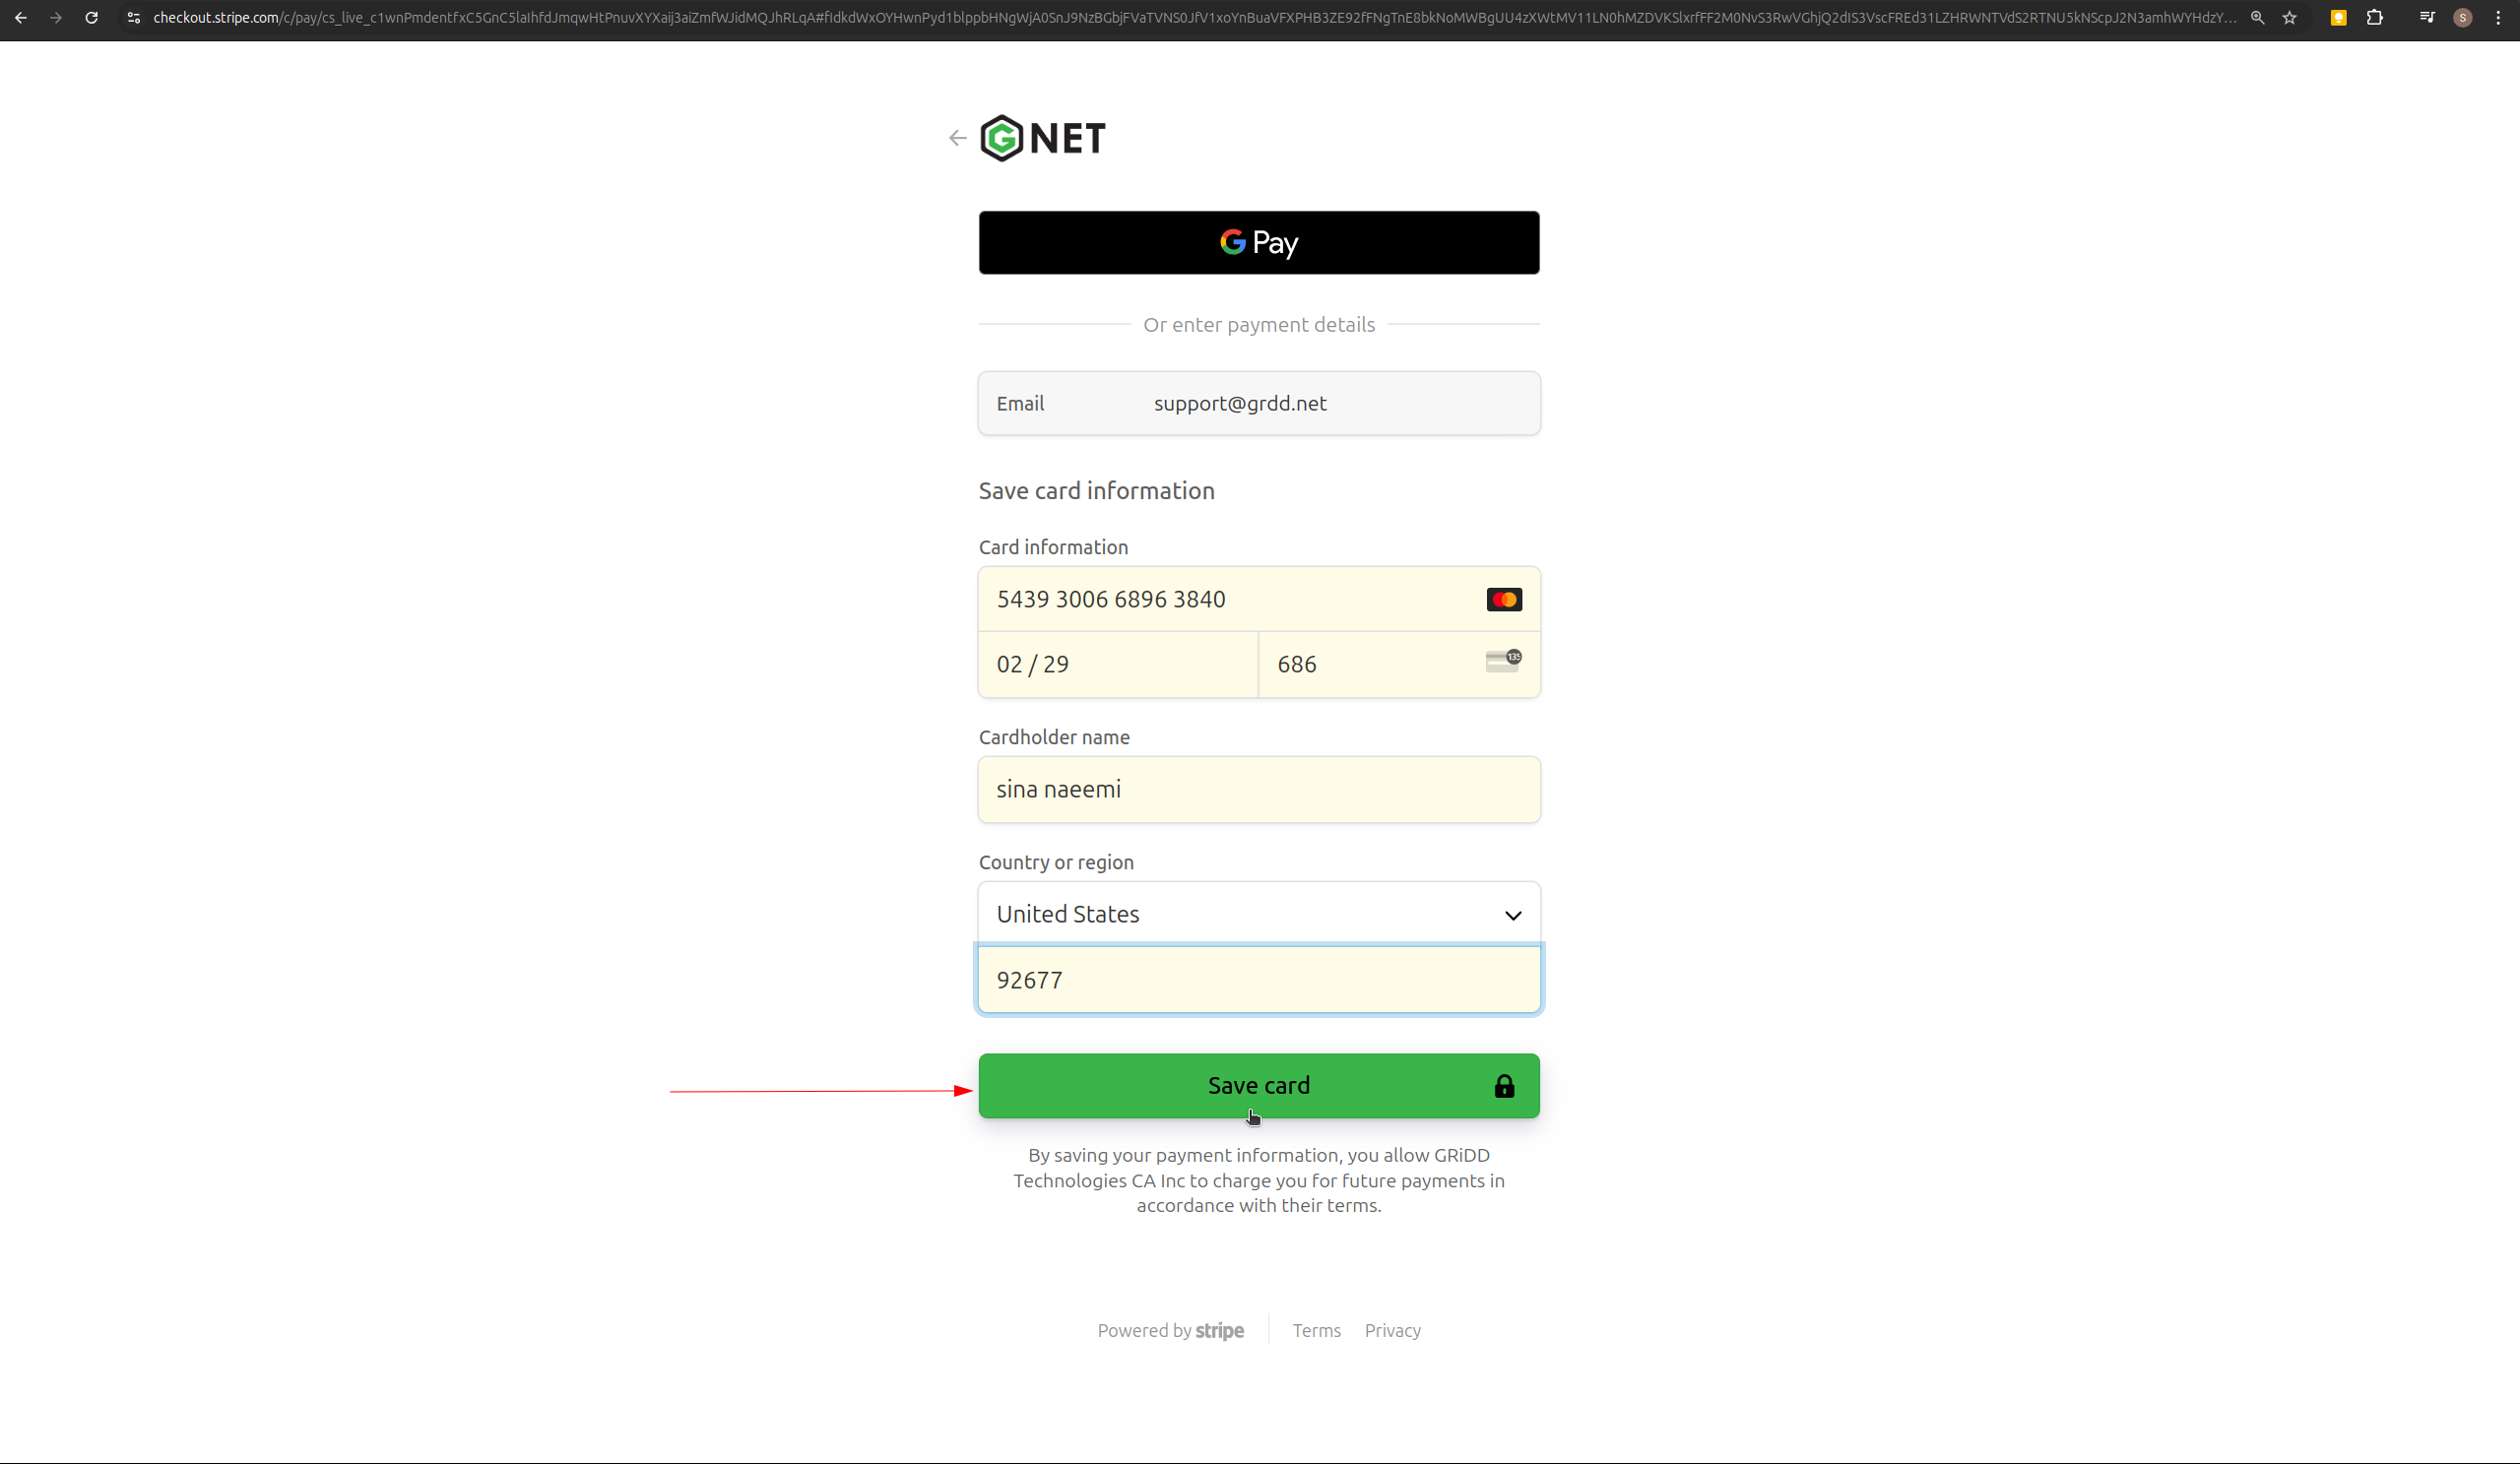
## Step 3: Enter Payment Details and Save
Choose your preferred payment method:
* Credit/Debit Card
* Bank Account
* Other Payment Forms
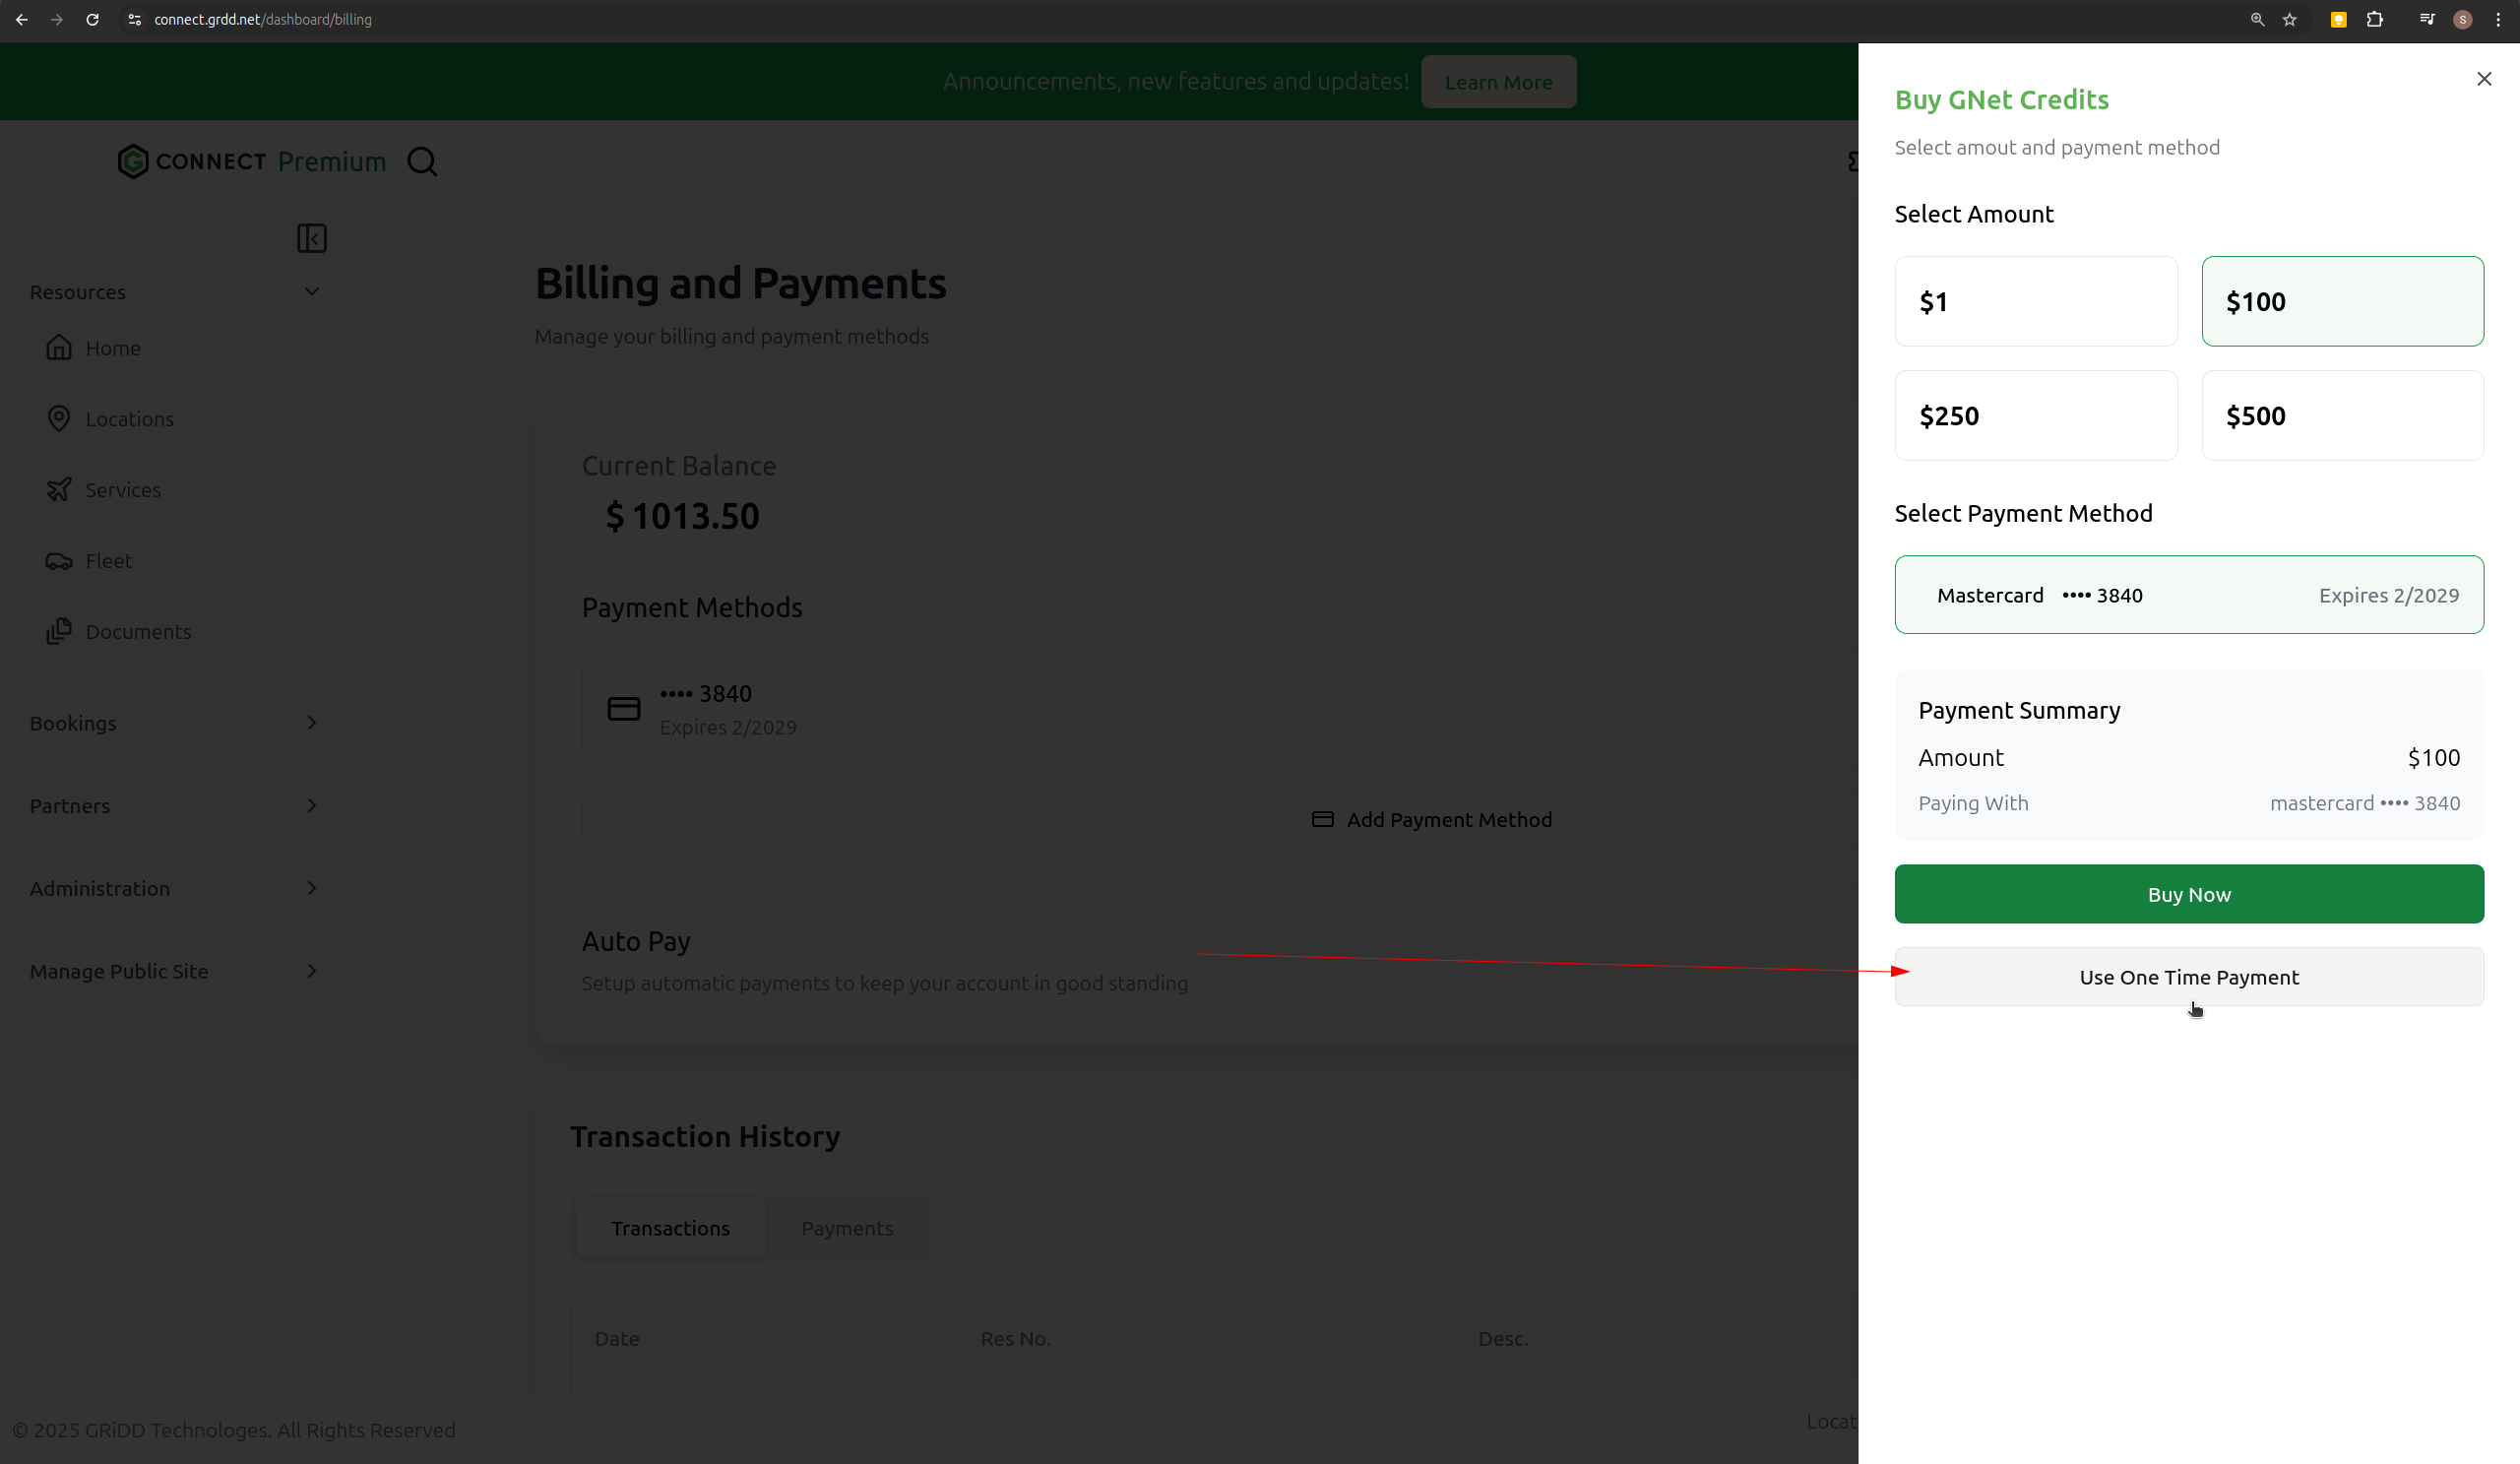
## Step 4: Add Credit
To make a payment:
1. Click "Add Credit"
2. Choose the amount
3. Select your payment method
4. Click "Buy Now"
## Step 5: Refresh Balance
Click the "Refresh" button to see your updated balance and transaction history.
## Payment Options
### Auto Pay
Enable Auto Pay to automatically charge your saved payment method when your balance goes negative. This ensures uninterrupted service.
### One-Time Payment
For users who prefer not to save payment information:
1. Choose "One-Time Payment"
2. Enter payment details
3. Complete transaction
4. Card information won't be stored
* You can add multiple payment methods to your account
* All payment information is securely encrypted
* Transaction history is available for your records
Make sure to keep your payment methods up to date to avoid any service interruptions.
 ```md theme={null}

```
## Step 2: Add Payment Method
Click on "Add Payment Method" to begin setting up your payment information.
```md theme={null}

```
## Step 2: Add Payment Method
Click on "Add Payment Method" to begin setting up your payment information.
 ## Step 3: Enter Payment Details and Save
Choose your preferred payment method:
* Credit/Debit Card
* Bank Account
* Other Payment Forms
## Step 3: Enter Payment Details and Save
Choose your preferred payment method:
* Credit/Debit Card
* Bank Account
* Other Payment Forms
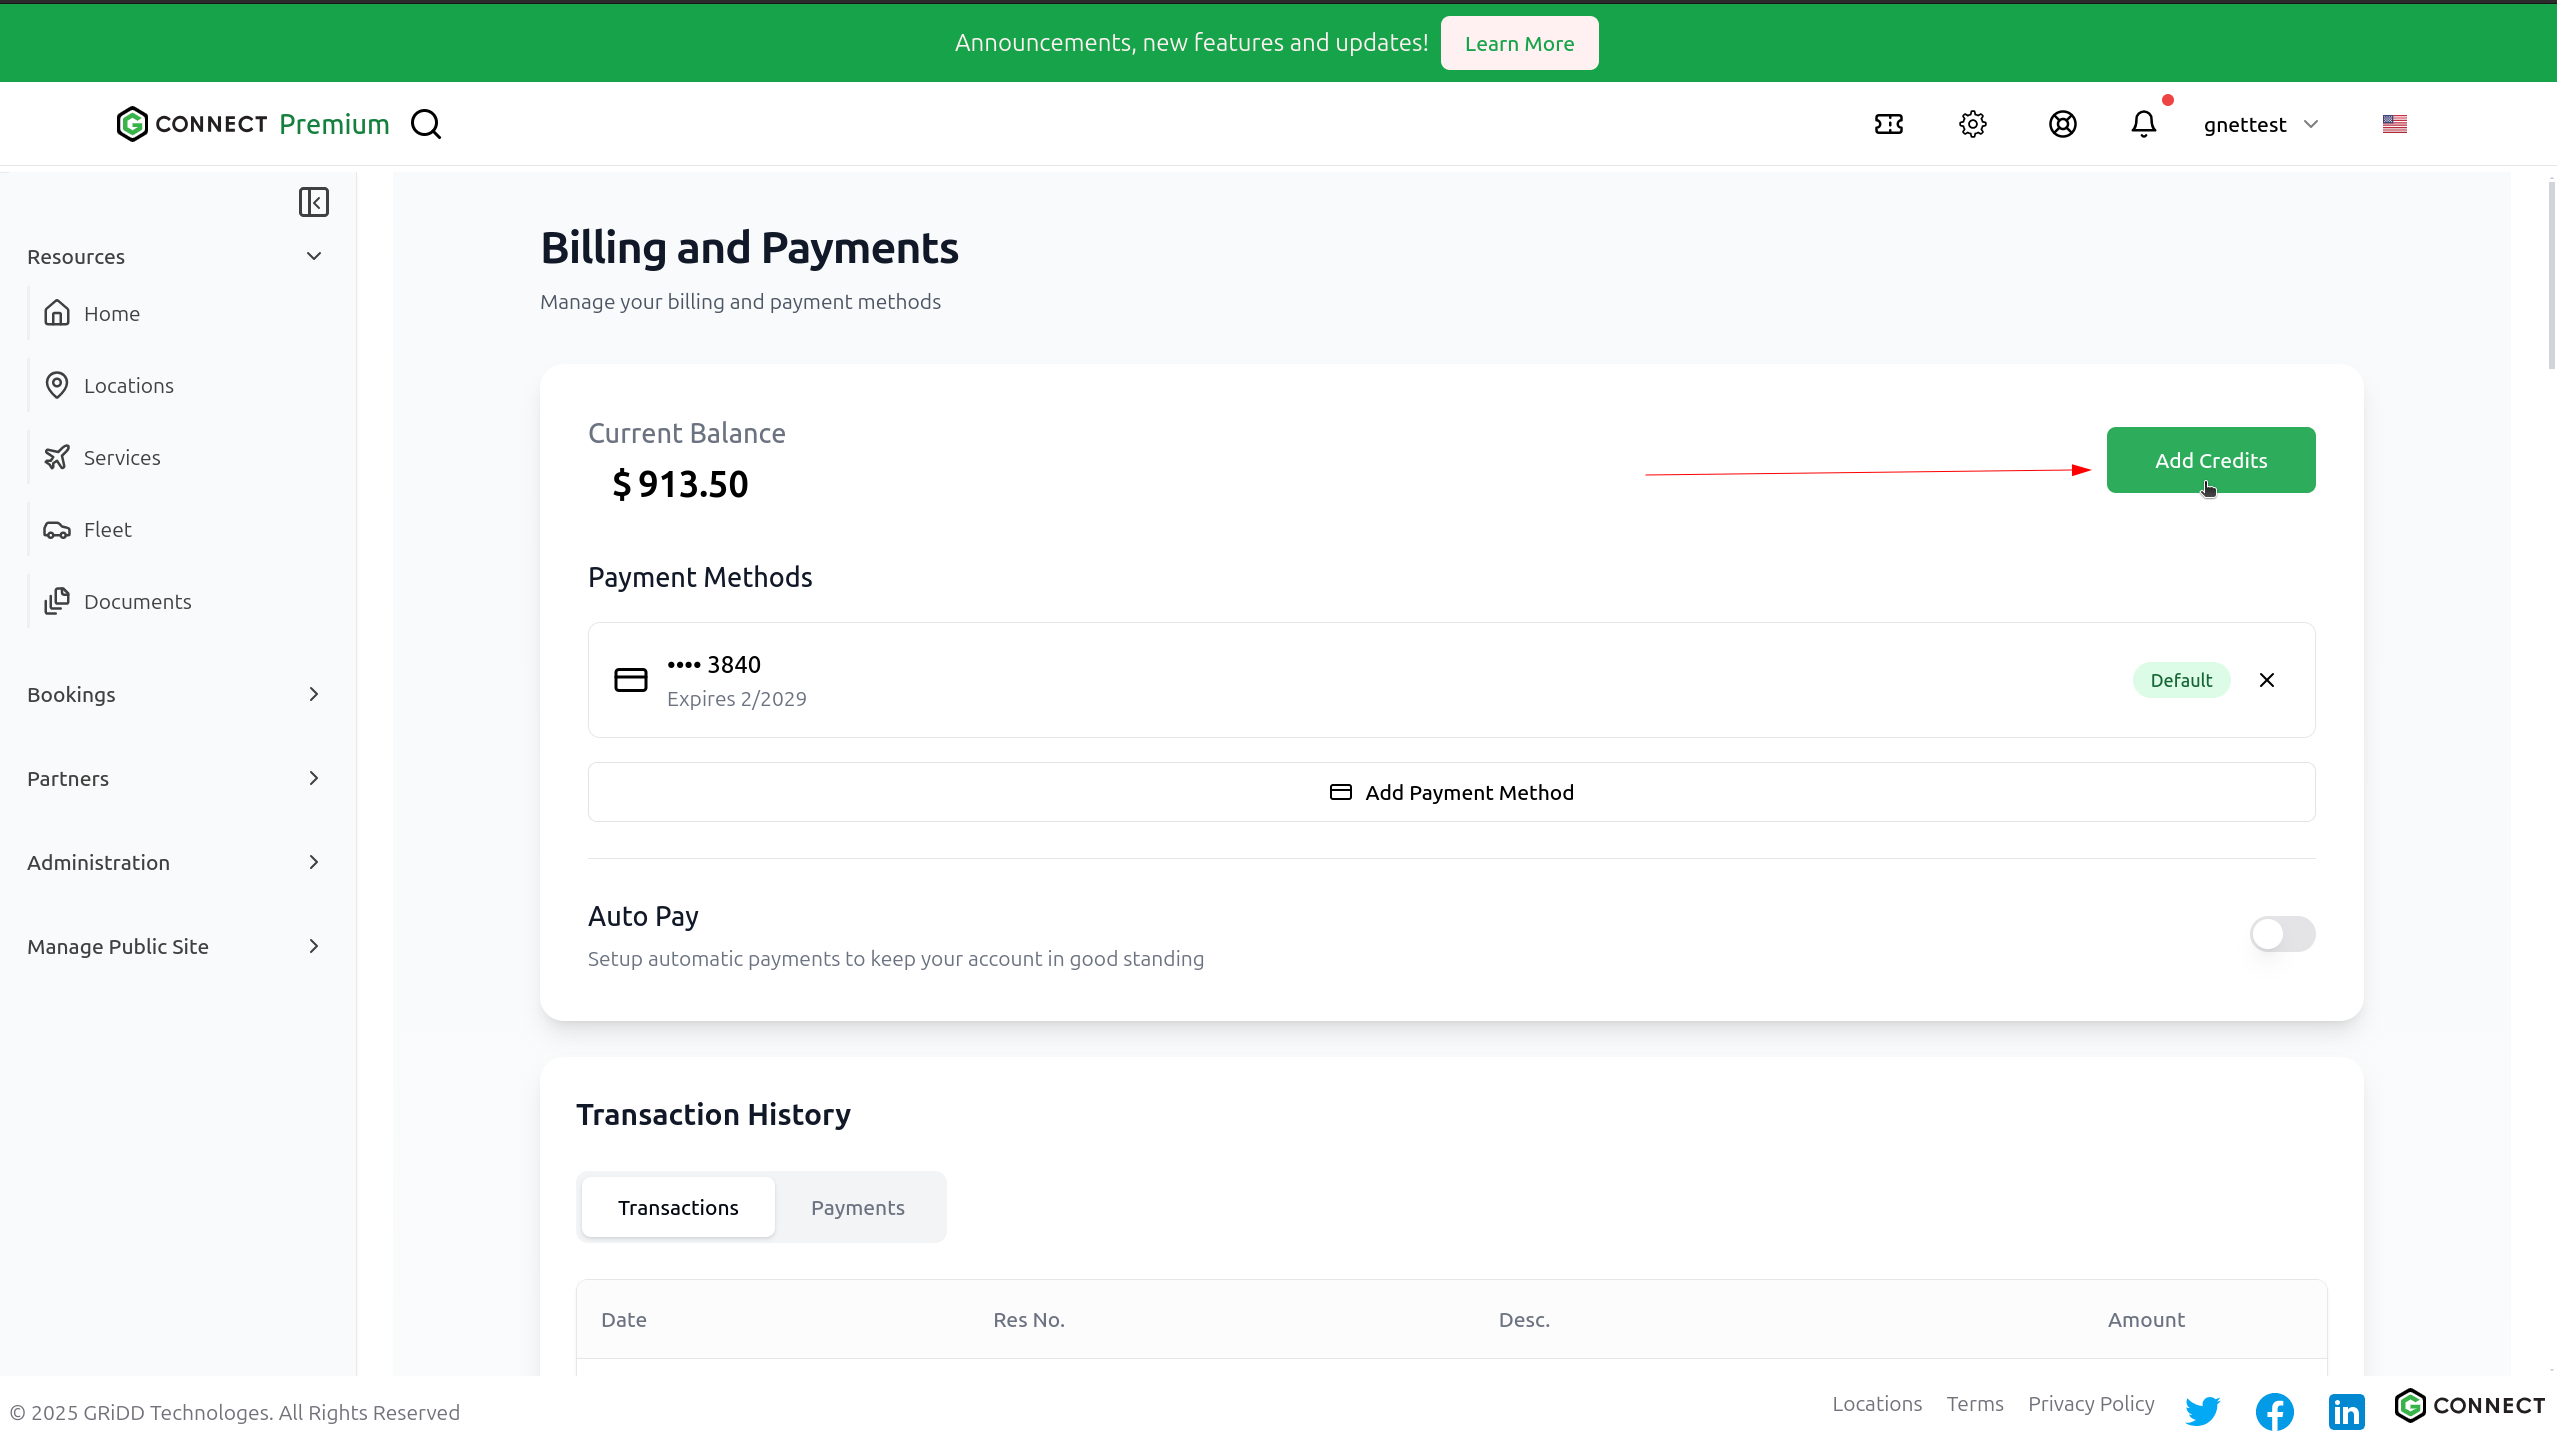
 ## Step 4: Add Credit
To make a payment:
1. Click "Add Credit"
2. Choose the amount
3. Select your payment method
4. Click "Buy Now"
## Step 4: Add Credit
To make a payment:
1. Click "Add Credit"
2. Choose the amount
3. Select your payment method
4. Click "Buy Now"
 ## Step 5: Refresh Balance
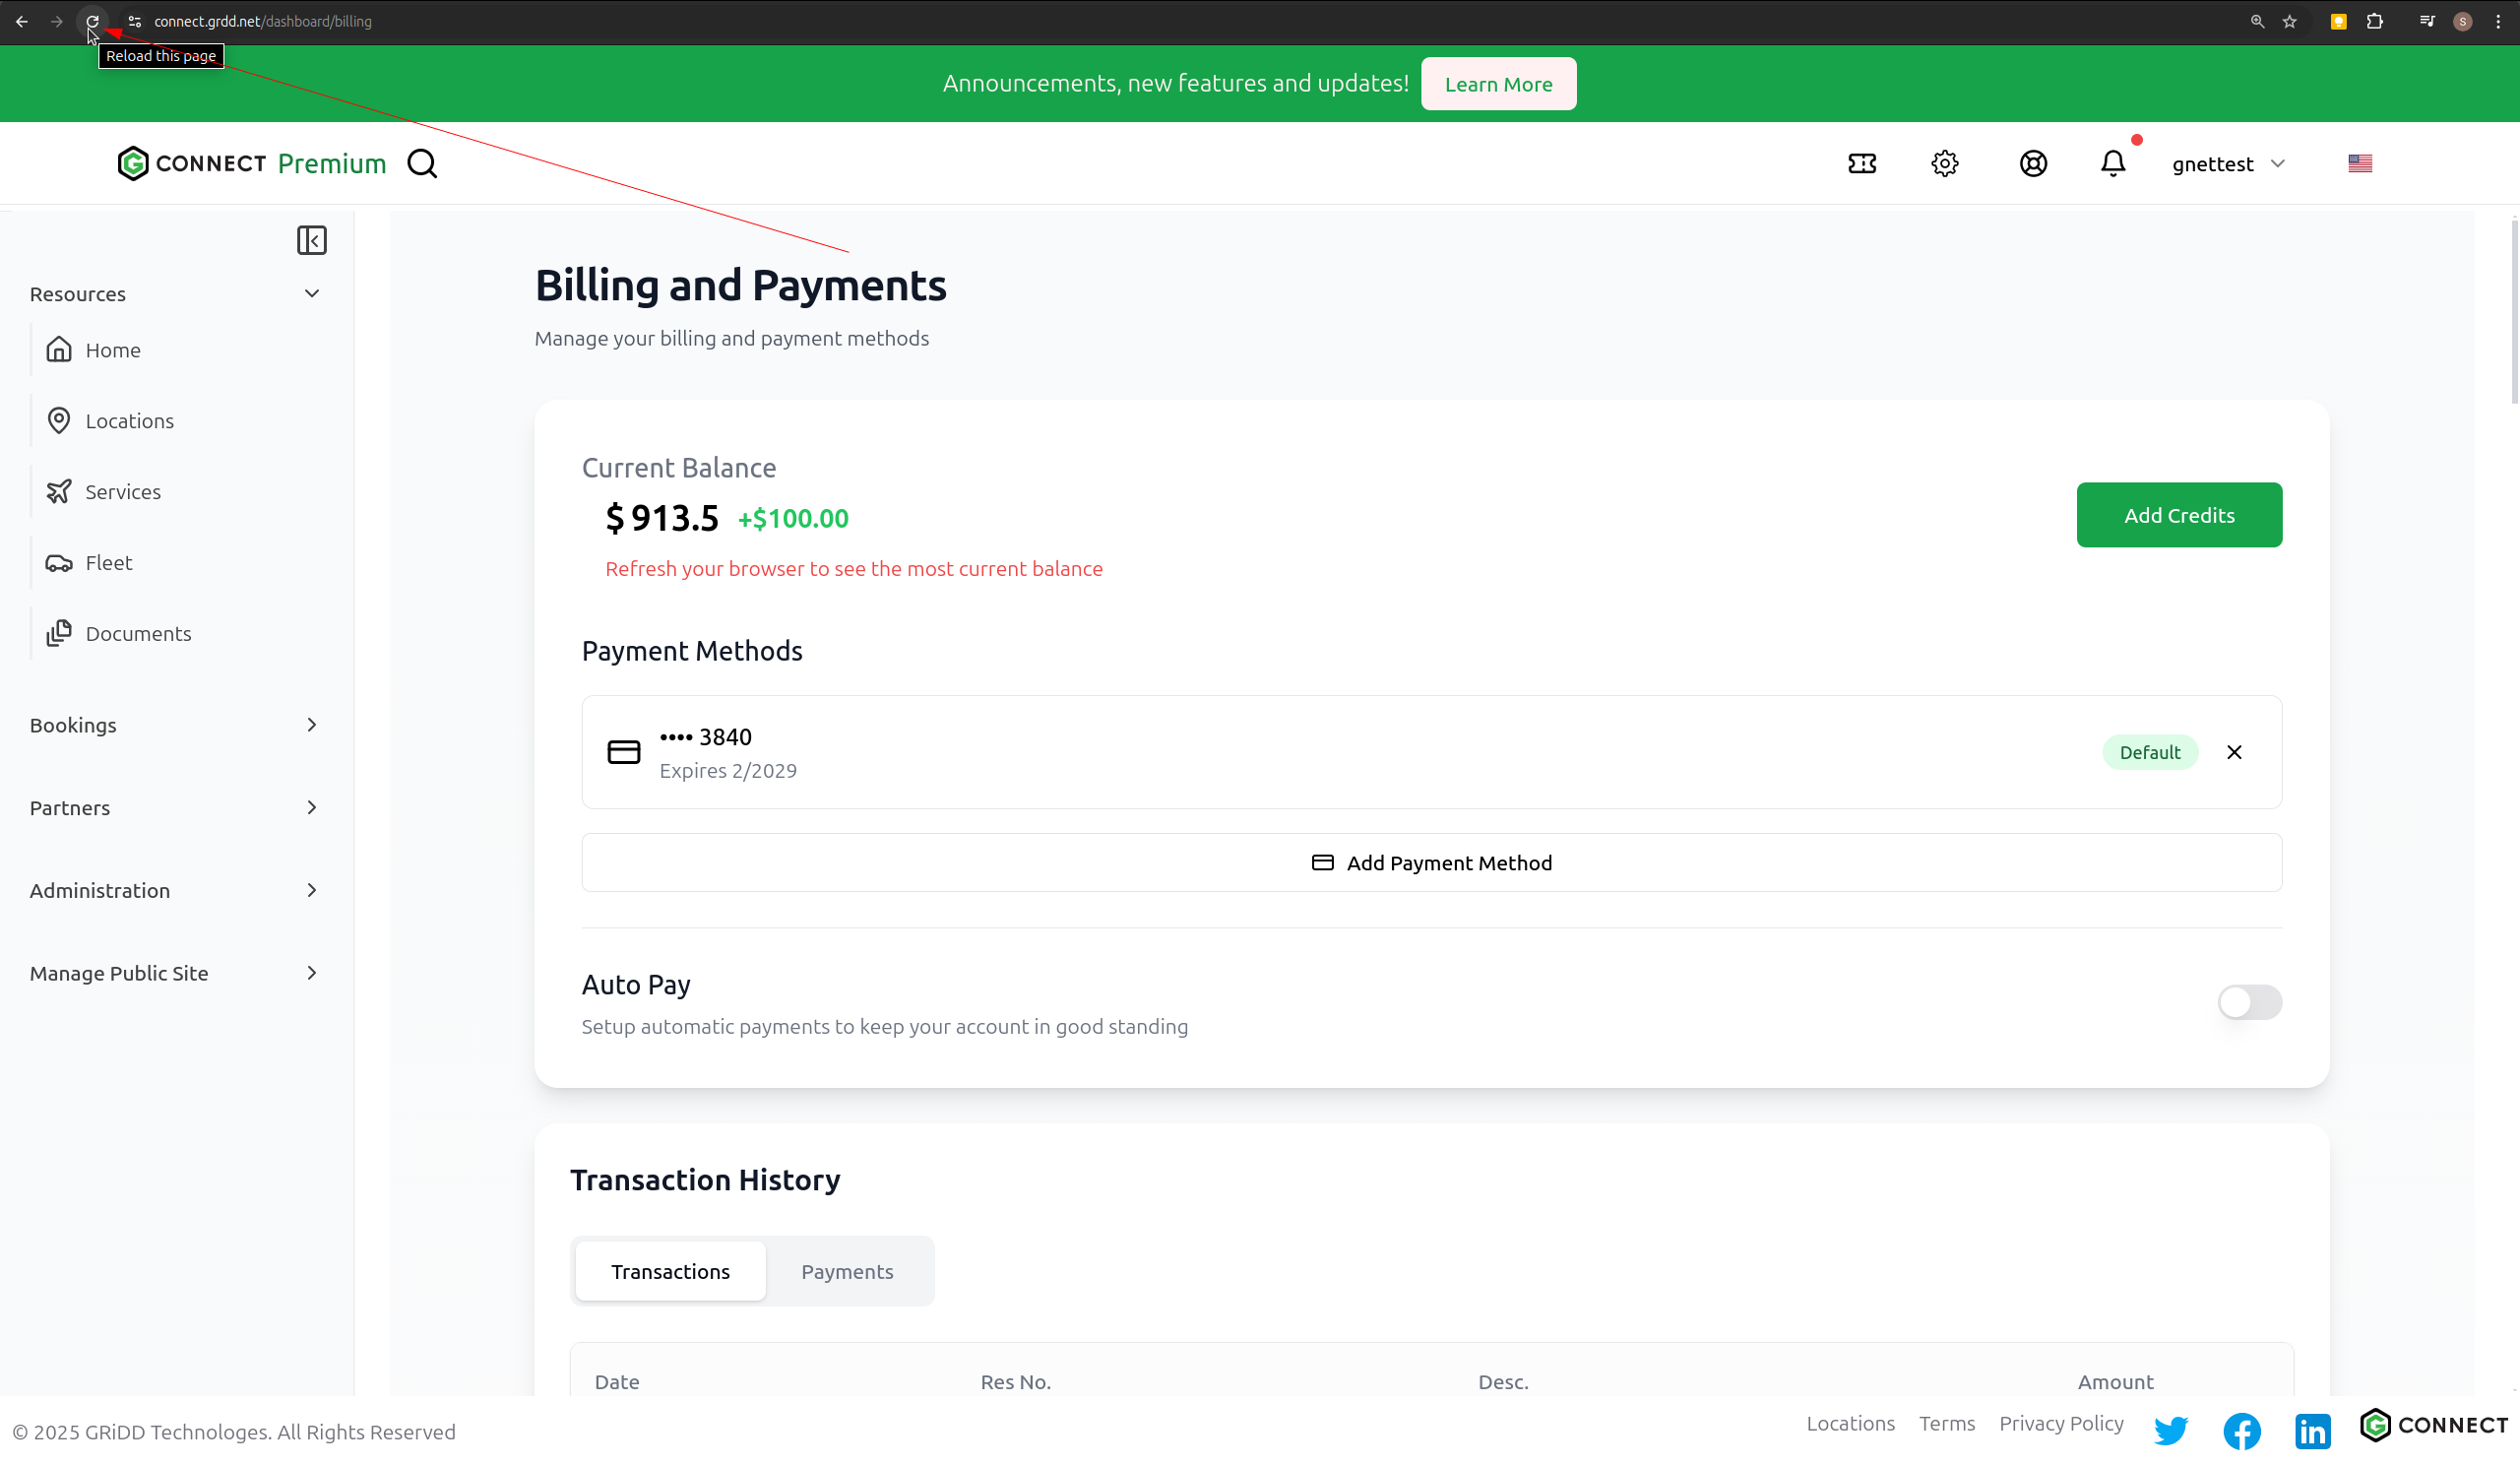
Click the "Refresh" button to see your updated balance and transaction history.
## Step 5: Refresh Balance
Click the "Refresh" button to see your updated balance and transaction history.
 ## Payment Options
### Auto Pay
Enable Auto Pay to automatically charge your saved payment method when your balance goes negative. This ensures uninterrupted service.
## Payment Options
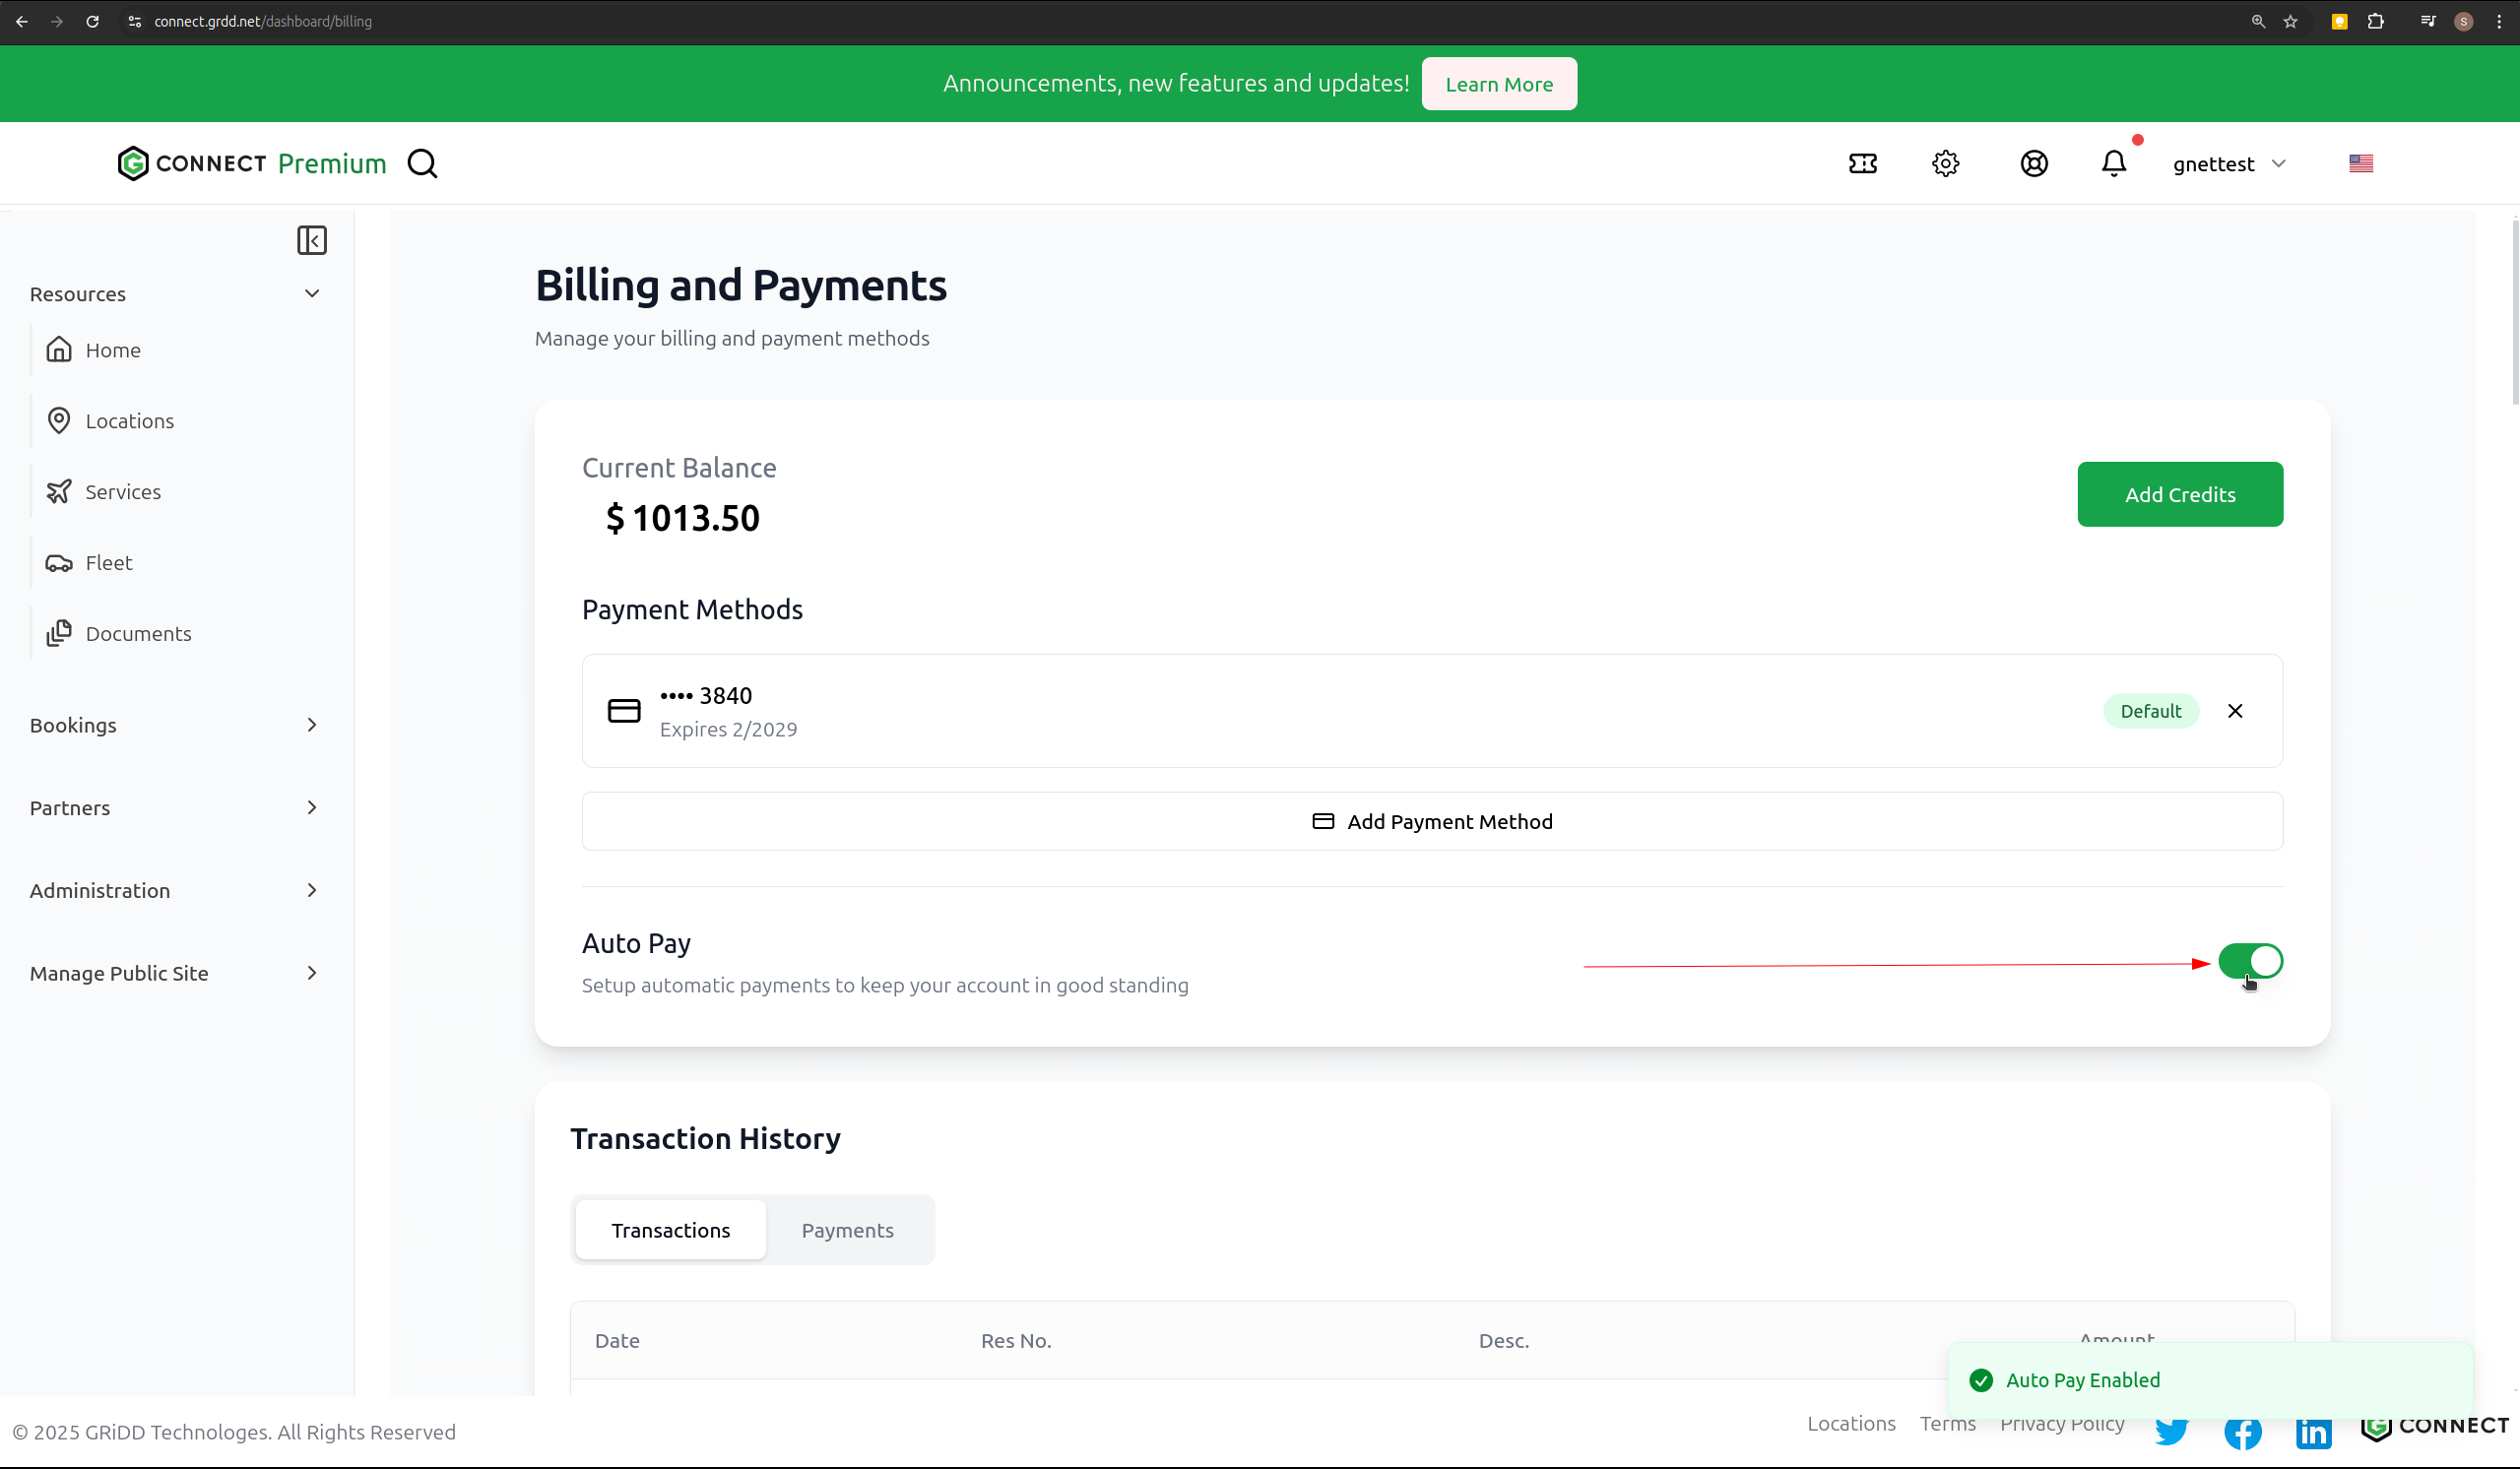
### Auto Pay
Enable Auto Pay to automatically charge your saved payment method when your balance goes negative. This ensures uninterrupted service.
 ### One-Time Payment
For users who prefer not to save payment information:
1. Choose "One-Time Payment"
2. Enter payment details
3. Complete transaction
4. Card information won't be stored
### One-Time Payment
For users who prefer not to save payment information:
1. Choose "One-Time Payment"
2. Enter payment details
3. Complete transaction
4. Card information won't be stored